DipGel Fill Application

Difficulty
Easy
Time required
20 Minutes
Salon price 
est. $40 / Mani
DipWell price
est. $3 / Mani
A step by step process on how to fill in overgrown dip powder nails at home using the gel method with DipGel. If you're wondering "how do you fill dip nails?" or "can I even do a dip nail refill?" we've got all the dip tips for you to learn how to refill your dip nails without soaking off your previous mani and starting from scratch.
PRO TIP: If you have major lifting, do not attempt a dip fill. Remove your mani completely and start fresh to avoid any potential contamination or fungal growth.
Loading products...
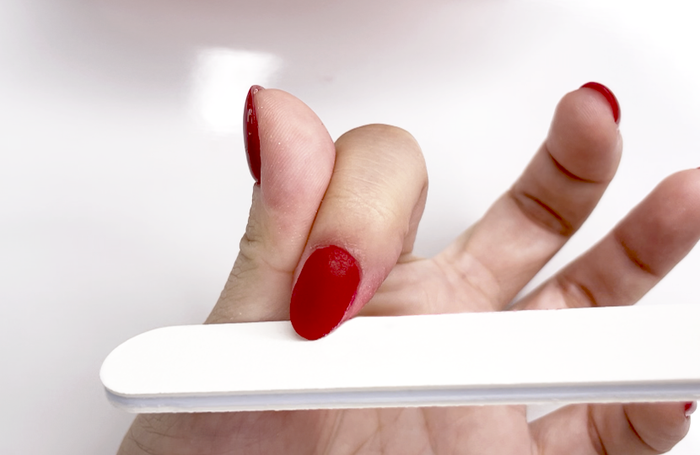
Step 1

- Use a coarse, 100-grit nail file or buffer to remove the gel topcoat. To prevent the final look from becoming too thick, continue filing down to the old dip powder. Remove all areas of lifting as needed.
PRO TIP: Fill application works best when reapplying with the same or darker color. If attempting to fill with a lighter color, be sure to file down to the base layer (not your natural nail).
Step 2
- File down areas of the old dip powder closest to the overgrown nail bed. This helps blend areas of the old dip powder to the natural nail bed for a smoother fill.
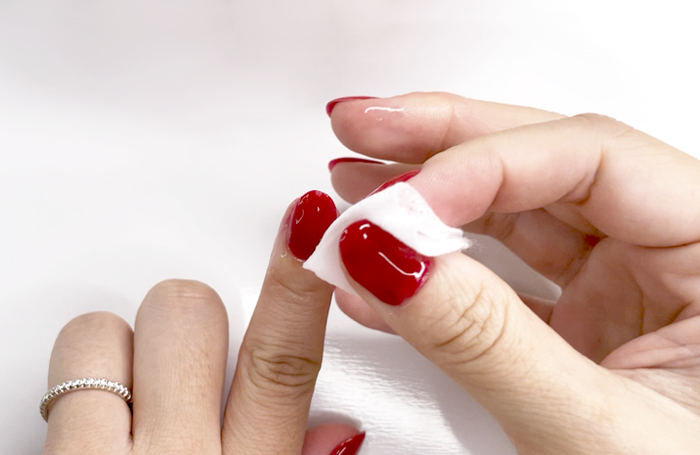
- Wash hands with warm water and/or use a lint-free wipe soaked in alcohol to remove filing debris and oil. Allow 3-5 minutes for hands & nails to fully dry.
Step 3

- Apply a coat of Gel Prep to all nails. Allow 1 minute for nails to dry.
PRO TIP: Gel Prep should remain tacky on the nails.
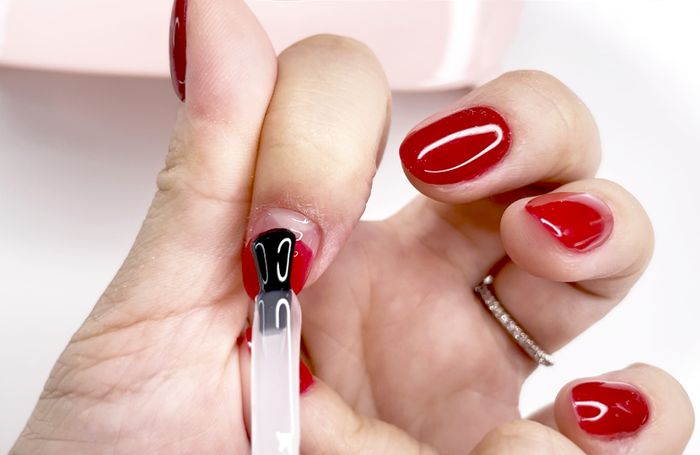
Step 4

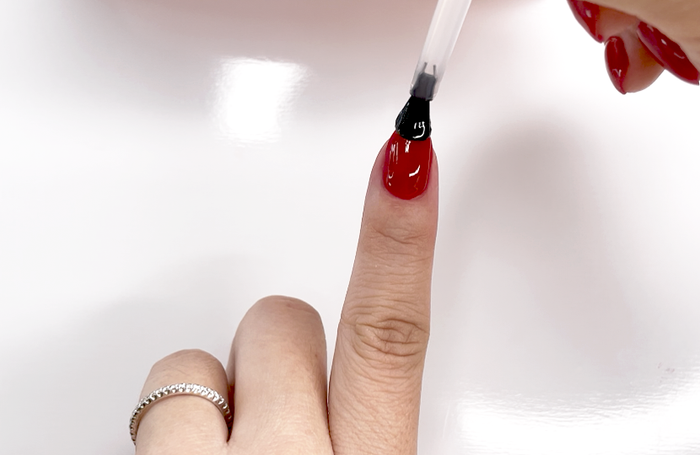
- Apply a thin coat of Gel Base to all nails (excluding thumbs), just past the edge of the old dip application.
- Cure under light for 45 seconds.
- Repeat steps 4a-4b for both thumbs.
Step 5
- Apply another thin coat of Gel Base (excluding thumbs). Again, be sure to apply just a little past the edge of the old dip application.
- Dip painted fingers at a 45 degree angle into color powder of choice. Tap off excess powder.
- Cure under light for 45 or 60 seconds.
Step 6
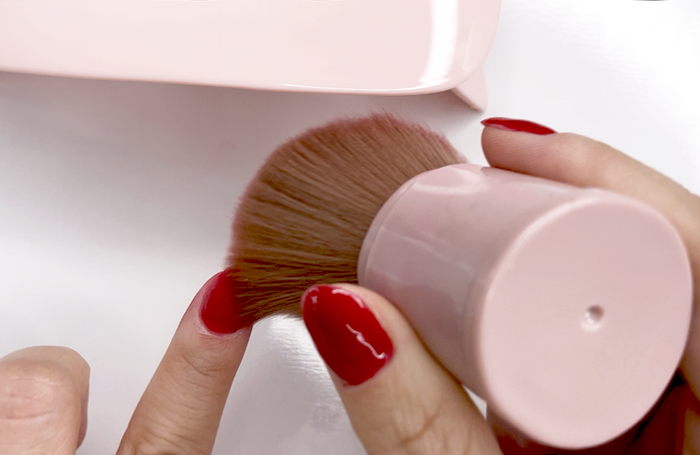
- Use a fluffy brush to remove excess powder.
- Repeat steps 5a-6a for both thumbs.
- Repeat steps 5a-6b for a second layer and more coverage.
PRO TIP: Don’t forget to wipe the gel brush with a paper towel before placing it back into the bottle!
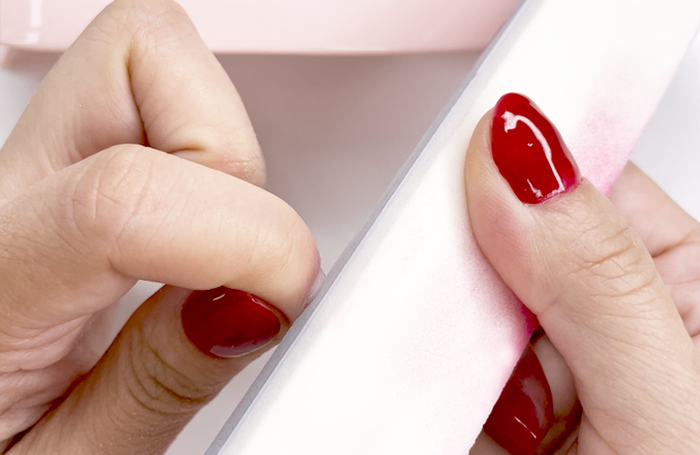
Step 7
- If needed, file and shape nails.
- Dust off filing debris with a fluffy brush.
- Wipe nails with a lint-free wipe saturated in alcohol. Allow 1 minute for nails to fully dry.
PRO TIP: Use a fine grit buffer to buff/smooth the surface of nails.
Step 8
- Apply a thin coat of Gel Top to all nails, excluding thumbs. Be sure to cap the free edge!
- Cure under light for 45 seconds.
PRO TIP: Don't forget to wipe the gel brush with a paper towel before placing it back into the bottle!
Step 9
- Repeat steps 8a-8b for the thumbs.
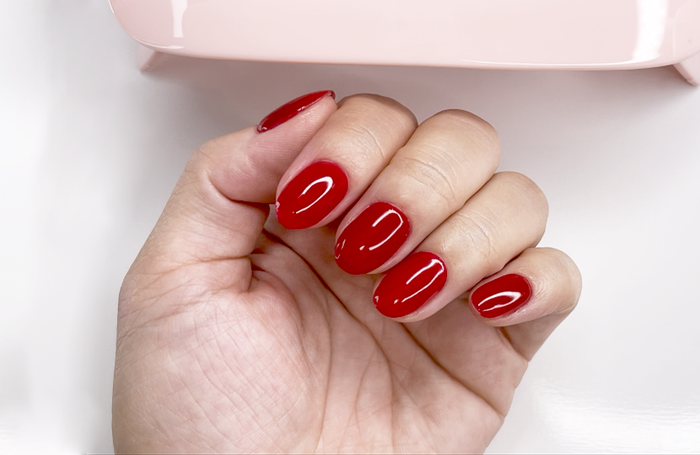
- Enjoy your gel dipped mani!
PRO TIP: No need to wipe nails with alcohol as Gel Top is non-tacky when cured.