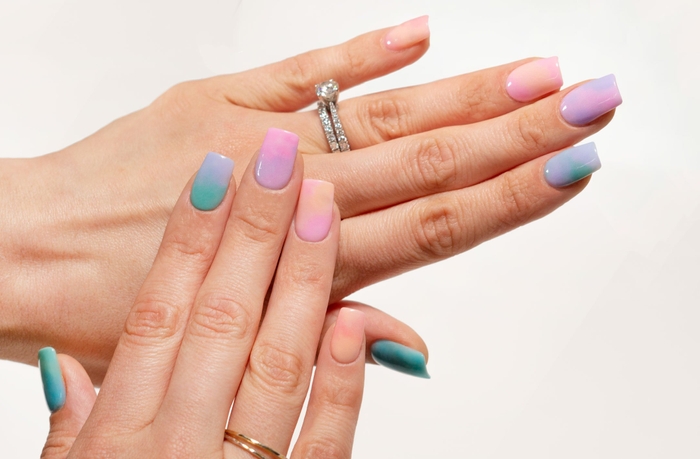
How To Apply A Pastel Gradient Mani

Difficulty
Moderate
Time required
1 Hour
Salon price 
est. $105 / Mani
DipWell price
est. $9 / Mani
Can't decide on just one color? Level up your mani game with this colorful array of gradient dip powder nails! This fun and easy nail art is a whole summer vibe - someone queue the pools floats & rosé!
PRO TIP: For a smoother transition to achieving gradient or ombre nails, be sure to use a fluffy brush to dust on color powder of choice. Keep in mind to clean the brush between each color powder application to avoid mixing unwanted ombre colors.
Loading products...
Step 1
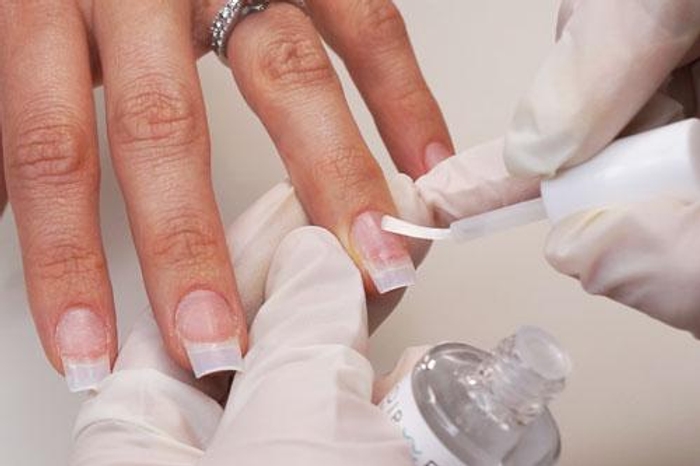
- Apply a coat of Step 1 Bond to all fingernails
PRO TIP: Make sure you thoroughly prep nails to ensure adhesion & long-lasting wear! Push back cuticles, create a rough texture on the nail plate by filing, and sanitize thoroughly.
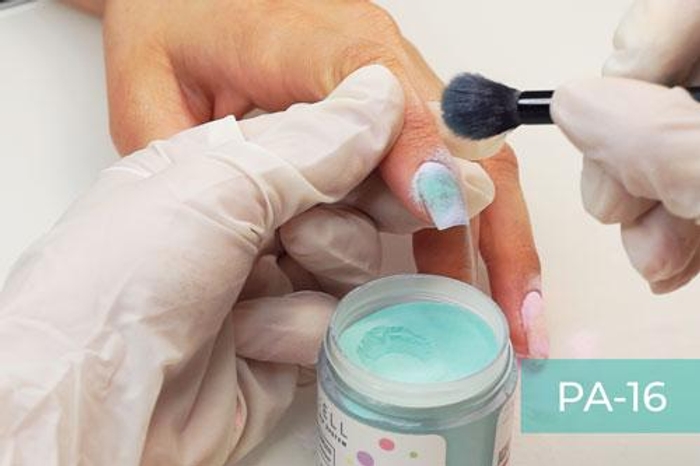
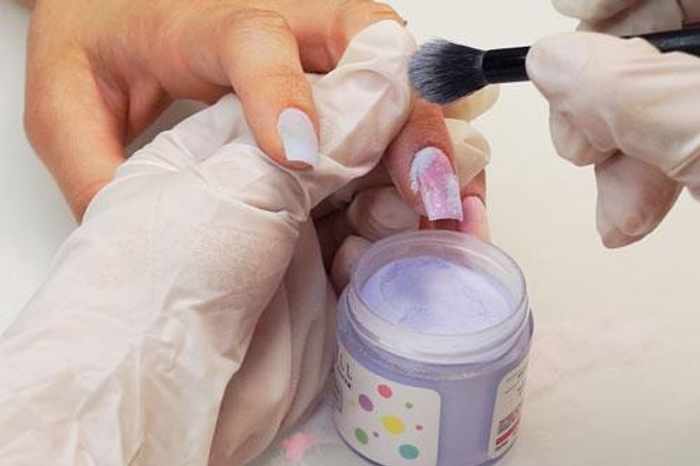
Step 2A
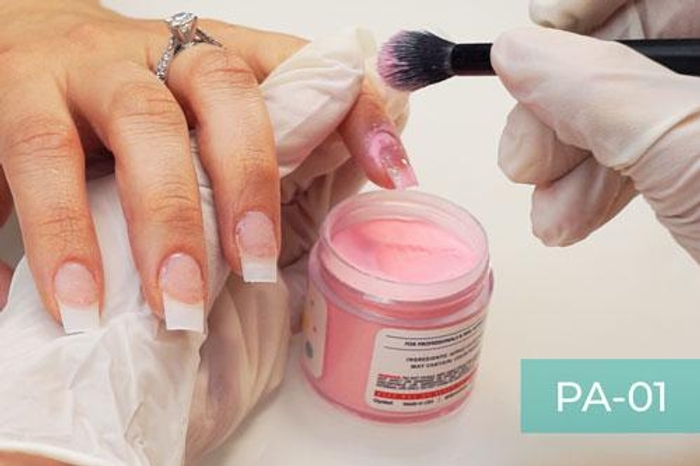

- Paint a thin coat of Step 2 Base and load a small fluffy brush with powder by dipping into color powder of choice
PRO TIP: Avoid getting the product onto cuticles, powder will pick up wherever Base if applied
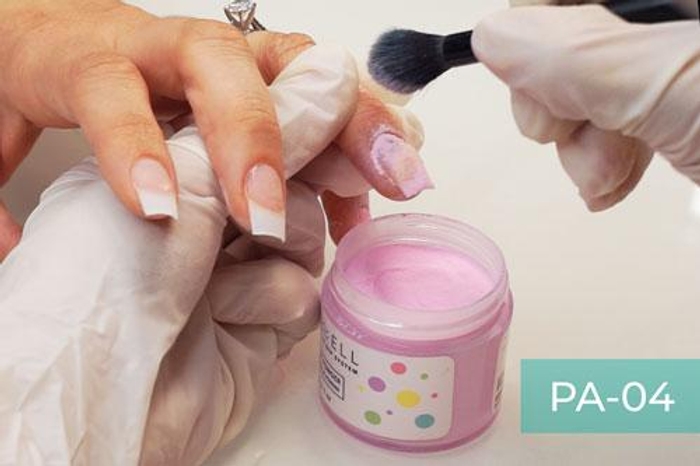
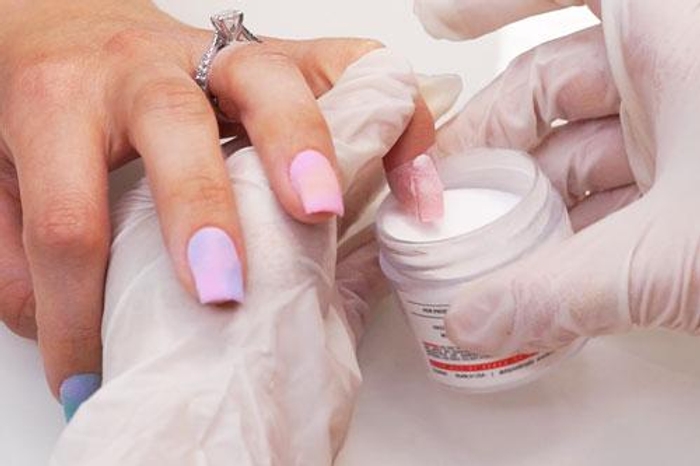
Step 2B
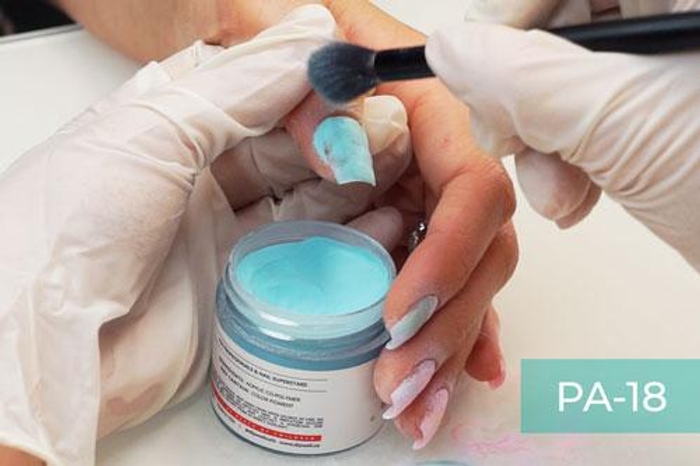
- Repeat to fill in the rest of the nail with the other color powders of choice
- Tap finger to rid of loose powder in between nails
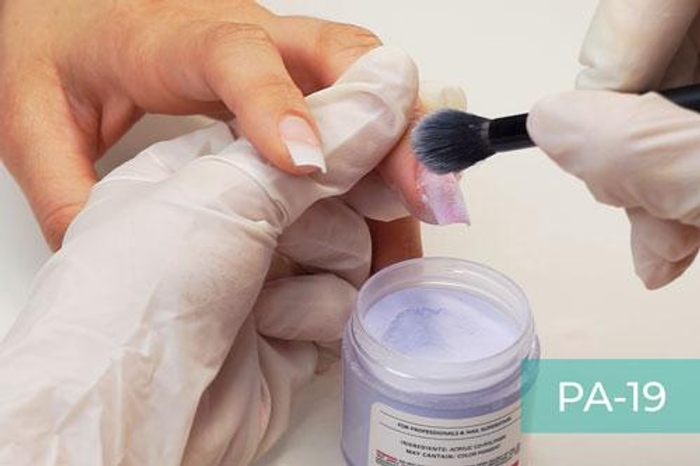
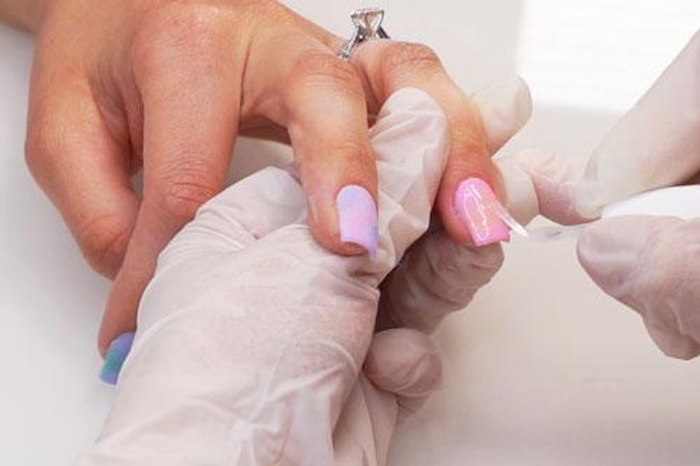
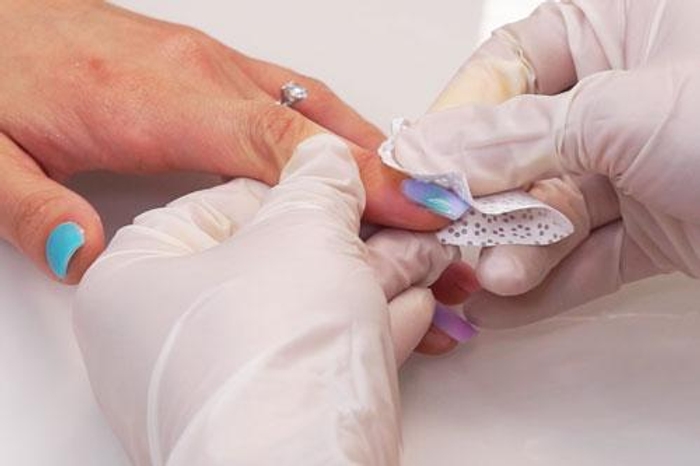
Step 3
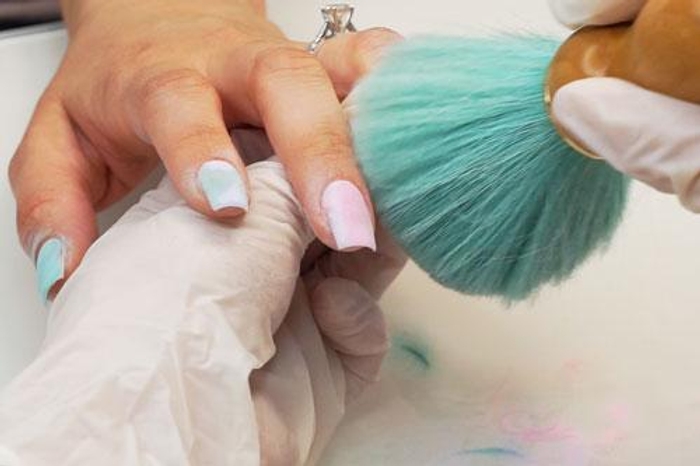
- Make sure to thoroughly swipe each nail to remove loose powder
Step 4
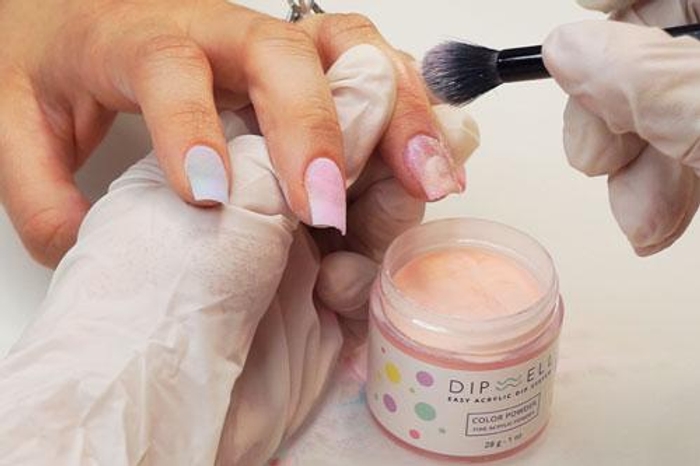
- Repeat for more coverage
PRO TIP: Brushes may harden or pick up color powder during application. Simply switch them between Brush Softener for easy cleaning & workability.
Get free tutorials, special deals every week!
Sign up for fresh nail inspo & exclusive discounts delivered right to your inbox.
By subscribing, you acknowledge our Privacy Policy.
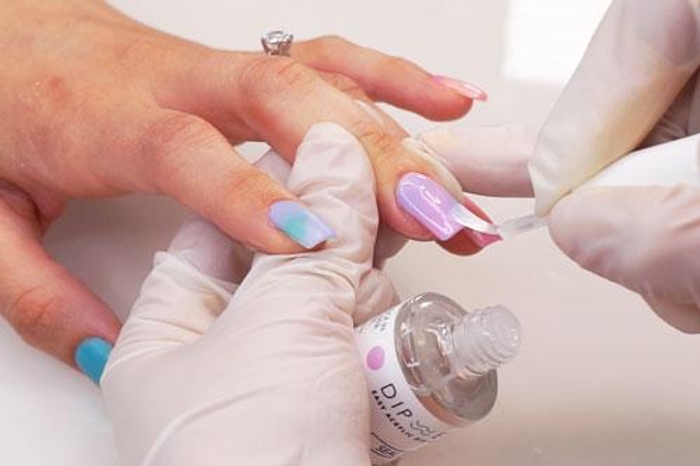
Step 5
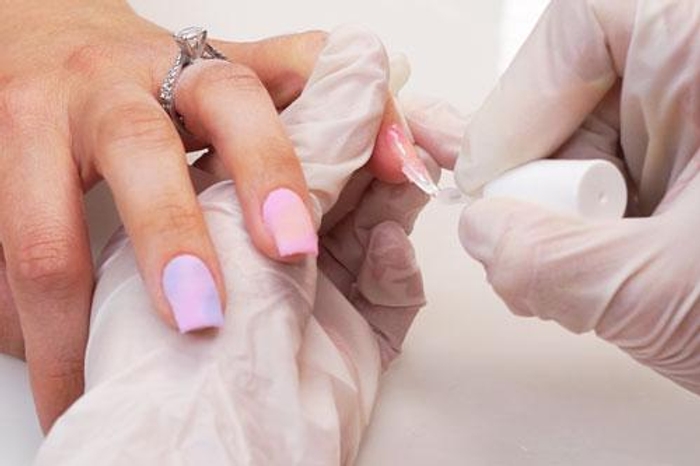
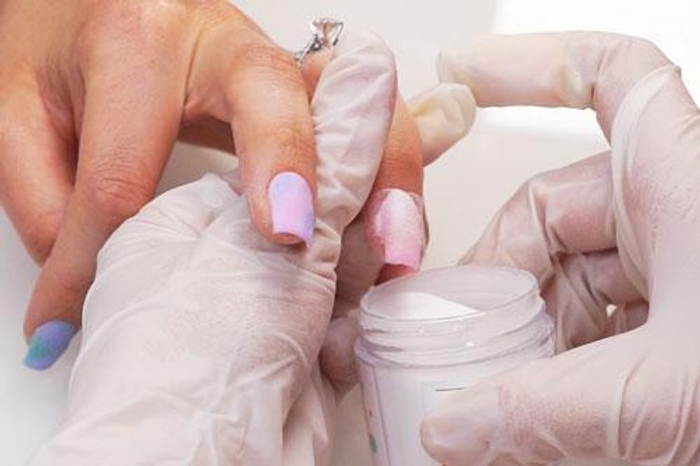
- Paint a thin coat of Step 2 Base, then immediately dip into Base & Finish
- Tap off loose powder and brush off excess
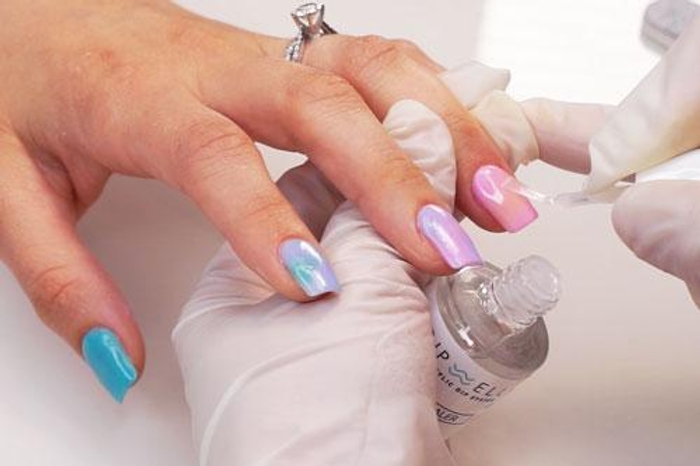
Step 6
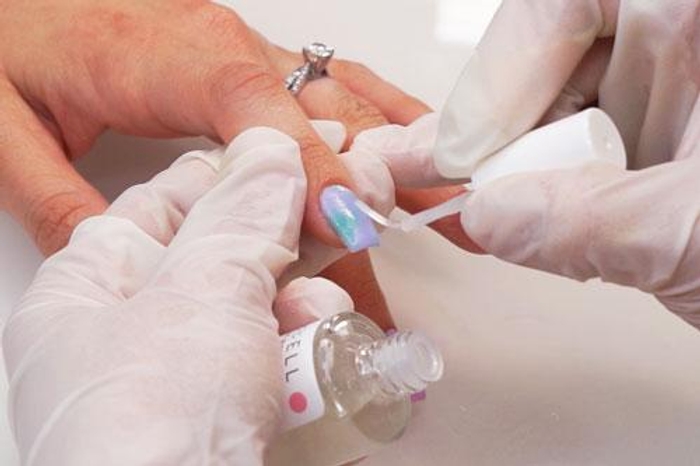
- Apply a coat of Step 3 Activator to harden the blend of powder & liquid
- Allow two minutes for Activator to dry completely
Step 7
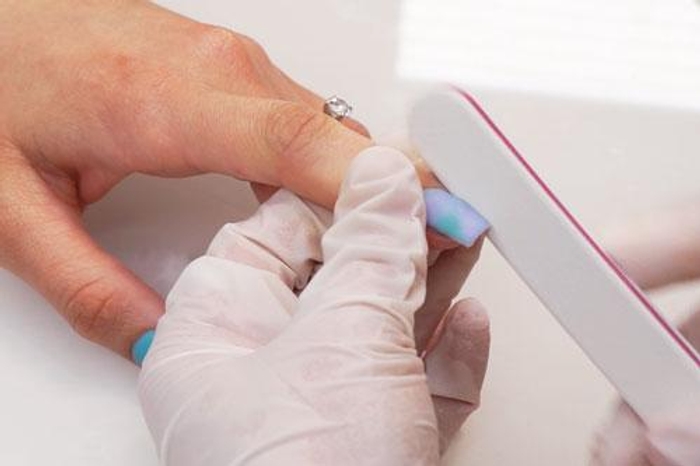
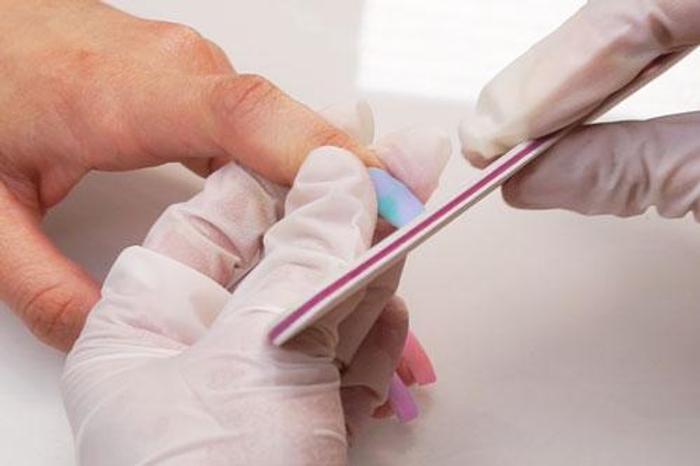
- When the blend of powder and liquid has hardened, file nails to the desired shape
- Use our coarse grit buffer to even out the preferred thickness of the nails, then use the 240 grit buffer to smooth the nail surface
Step 8
- Wash hands and nails thoroughly or wipe with alcohol
Step 9

- Apply a coat of Activator to harden the blend of powder & liquid
- Apply another coat of Activator and allow 3-4 minutes for Activator to completely dry
Step 10
- Apply a coat of Sealer in quick thin strokes
- Allow 3 minutes for nails to dry
Step 11
- Apply a coat of Sealer in quick thin strokes
- Allow 3 minutes for nails to dry
Get free tutorials, special deals every week!
Sign up for fresh nail inspo & exclusive discounts delivered right to your inbox.
By subscribing, you acknowledge our Privacy Policy.