We talk a lot about nail care around here. And we’d be remiss not to discuss what’s just as important as your actual nails...
Your cuticles.
It’s easy to see them as an annoyance. They can seem harmless at best and an enemy to be banished at worst.
Untamed cuticles can cause your dip mani to lift, ruining an otherwise perfect manicure.
No worries, dear reader.
We’ll help you understand once and for all how to actually take care of your cuticles. (You might have been doing it all wrong!)
But first, let’s get down to the basics.
What are cuticles?
Cuticle is the dead skin at the base of a fingernail or toenail.
It actually acts as a protective sealant against bacteria that may wreak havoc in the nail matrix. (Psst, the nail matrix is where the new nail plate begins to form.)
A common misconception is that the proximal nail fold of the eponychium is the cuticle.
It’s not.
To illustrate (and avoid confusion):
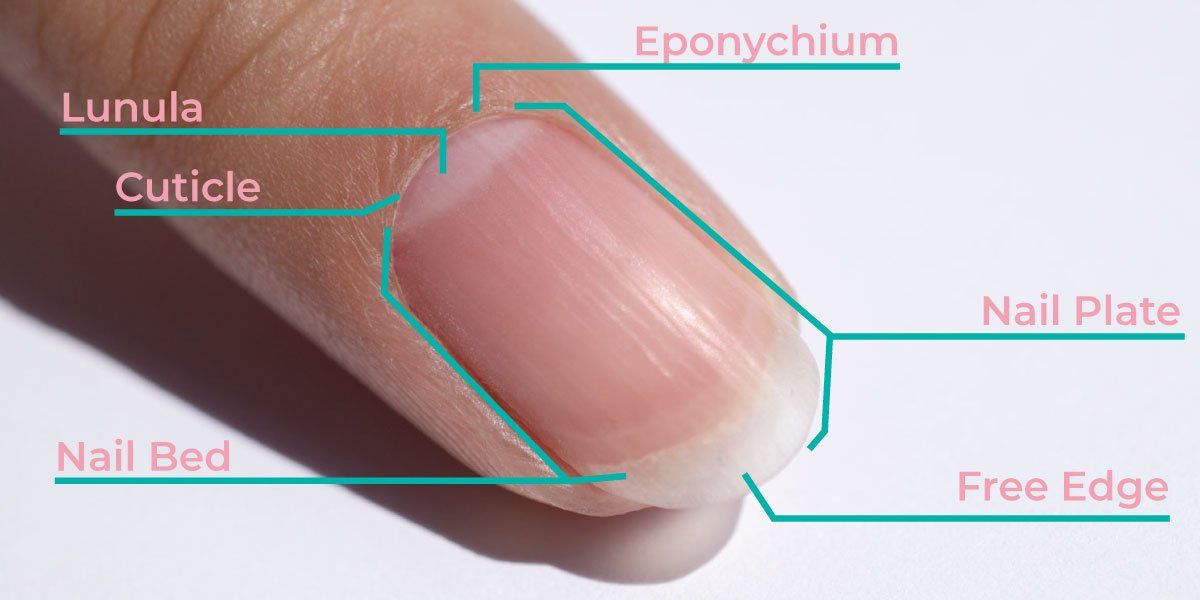
Here's the rule of thumb.
If you’re getting rid of what you think are your cuticles and you start noticing inflammation, you’re most likely messing with the wrong skin cells there, friend. You’re probably cutting the nail folds which are LIVING skin cells. Cuticles are DEAD skin cells underneath the nail fold and cutting them—when done right—shouldn’t cause any inflammation.
Take precautions. Cutting the wrong thing may lead to the dreaded nail fold infection called paronychia.
How do you actually take care of your cuticles?
The easiest way is something you can do in your sleep.
Get in the habit of applying cuticle care products Every. Single. Day. There are so many products to choose from: cuticle oil, cuticle cream, and even the good ol' hand lotion.
This is a must-not-skip step in your daily routine.
Whether or not you cut or trim, or even if you just want to push your cuticles back, it’s essential to keep your cuticles moisturized on the regular to help prevent any nail health issues from cropping up.
Now, for the more advanced options. (Look at you, brave soul!)
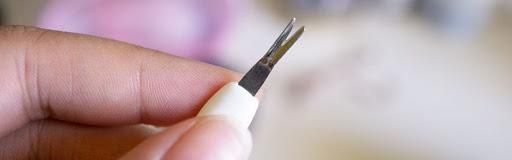
#1. THE HANDLE WITH CARE OPTION: Cutting or trimming your cuticles
All of us want a picture-perfect mani, but sometimes ragged cuticles get in the way.
So to keep them in check, most salon manicurists will cut your cuticles back with a small trimmer.
You may have seen cuticle care articles suggesting that you ask your nail tech to keep your cuticles intact to prevent infection.
But when done properly, cutting your cuticles is fine.
Whether you choose to cut or not-cut is a matter of preference. If you’ve dealt with nail bed infections in the past, then it’s best to skip the trimming next time you do your cuticle care routine.
This is admittedly a hot-button option that gets mixed reactions from nail care aficionados.
But let’s reiterate this: trimming can be safe, and it's a great way to deal with the extra-tough cuticles that we all get from time to time.
#2. THE SUPER SAFEST OPTION: Pushing back your cuticles
If you want to go the safest route, then simply push ‘em back.
Just like a lot of women prefer pushing back cuticles for a neater look—even when their nails are bare.
The only non-intimidating tool you need? Cuticle pushers that come in a variety of styles and materials. The most traditional being metal and orangewood.
But today, you'll learn about a much better option.
Because you can never be too careful when you’re caring for your cuticles.
That’s why we’ve created a brand new tool for you to use if you want to DIY your cuticle care.
Curiosity piqued? Say no more. (We’re just as head over heels excited about it!)
Get free tutorials, special deals every week!
Sign up for fresh nail inspo & exclusive discounts delivered right to your inbox.
By subscribing, you acknowledge our Privacy Policy.
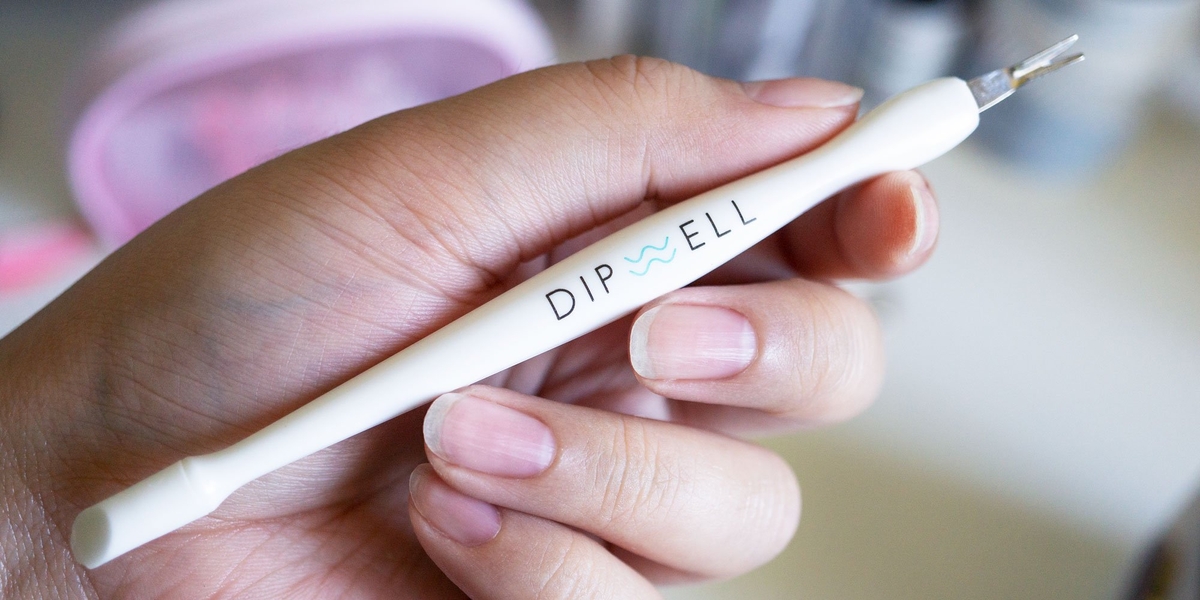
Introducing… The DipWell Jelly Pusher
After months of testing, we’re thrilled to introduce our very own Jelly Pusher.
The DipWell team has decades of collective experience, and we’ve put all that expertise into creating the Jelly Pusher that’s gentler than anything else we’ve tried.
It’s ultrasoft, which was important to us. No one likes the stinging feeling of a cuticle that’s been pinched or chafed.
Some cuticle pushers are just too abrasive. In fact, some metal scrapers can even scratch the surface of your nails as you push back your cuticles. Eek!
With the Jelly Pusher, you don’t have to worry about damaging your nail bed.
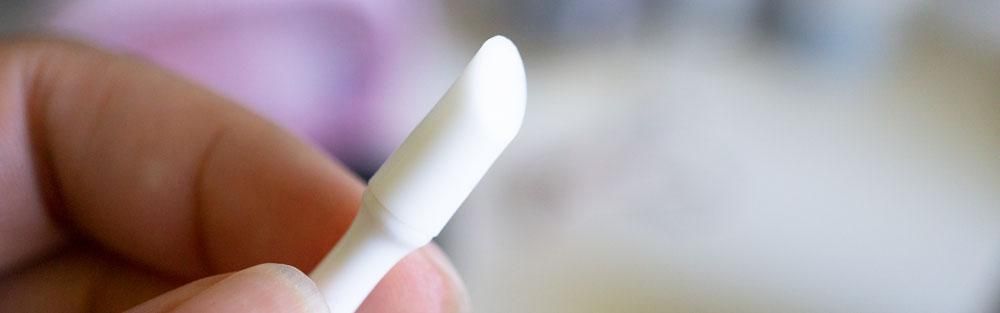
We’ve used soft silicone jelly that pampers your nails and makes the job much more pleasant.
The curved tip ergonomically fits to the shape of your nail, meaning more effective cuticle clearing for the win.
Taking care of your cuticles has never been so easy and enjoyable.
Plus, the Jelly Pusher is multifunctional, kinda like the Swiss Army knife of nail tools.
Once you’ve pushed back your cuticles, you can use the metal end to gently trim any remaining tough-spots and even hangnails.
Then keep this tool handy during your dip mani to keep powder from sticking to your skin (one of the big causes of lifting). Just use the silicone end of the cuticle pusher to wipe away any stray powder and create a clean line at the base of your nails.
Now, If you've struggled with lifting so much, work on your cuticle skills and prepare to be amazed with your longest lasting set of dip nails ever.
Care for your cuticles to avoid lifting
1. Observe proper cuticle prep
Sine, Licensed Cosmetologist and DipWell's Community Educator, explains:
"Prep is really important. Take your time and make sure you get rid of all the invisible cuticle that grows up your nail bed. This is a major cause of lifting. I use cuticle remover to make sure I remove all the invisible cuticle prior to application. Make sure all the steps during DIP application are 100% dry including the natural nail bed. Using a fan can help speed the process up.”
(Just be careful with the fan use once you start applying the dip liquids, as it can speed the dry times which can lead to splotchy dip powder application.)
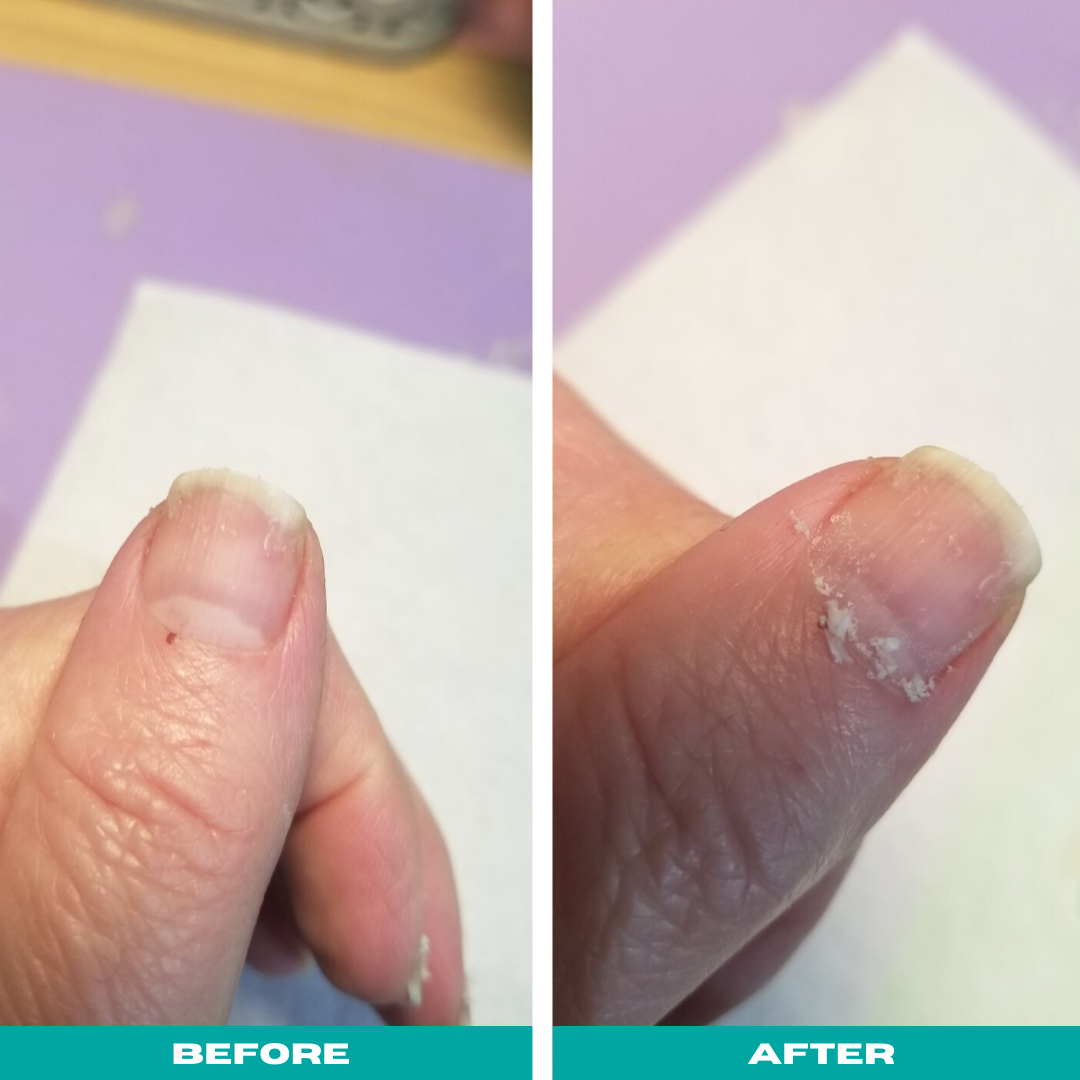
Did you just read "the invisible cuticle"? Yup, and this dead skin that you can't see is truly a sneaky, pesky enemy.
2. Remove your invisible cuticles
You can do so by gently buffing the invisible cuticles using a 100 Grit Nail File or the smoother side of the white Fine Grit Buffer included in the Dipwell Starter Kit. Take note that you don’t need to buff your entire nail for each dip manicure, as you’ll end up with paper thin nails. You should only be buffing the new growth.
3. Avoid getting the dip nail liquids on your cuticles
If you're experiencing lifting, it may also be because your liquid application is way too close to the cuticles. Applying a thin coat helps make sure you're not flooding the cuticle area with dip liquid where the dip powder will adhere to. Keep your dip mani further back. A couple of millimeters away from the cuticle is a good enough space. Try the apex method to make sure the cuticle area is less bulky.
(Learn How to Build an Apex for Dip Manis in 8 easy steps.)
4. Keep things nice and tidy around the cuticle line after each dip
Perfect the cuticle area with this recommendation from Dasia, DipWell's Community Educator:
"Run a pointed tool like a toothpick or cuticle stick (or, in my case, I use the metal end of the Jelly Pusher) around your cuticles between dip layers to remove the excess product. I do it right after pulling my finger out of the powder. If you wait too long, the powder will be too hard."
WATCH THE VIDEO: How to Clean Your Cuticle Lines
Not only will this trick result in a clean cuticle line, but it will also give you the right amount of space between the acrylic dip and the cuticle, so you can file and properly seal the dip all the way around your cuticles.
And there it is… the cuticle care guide for your next nail pampering session.
Your cuticles may be a dead layer of skin, but they have a huge impact on your overall nail health.
So, never forget to include them in your nail care regimen.
And remember when we mentioned how people often mistake the proximal fold as the cuticle and they end with less-than-pleasant experience? Yup, let’s avoid that from happening to you.
Want more tips on maintaining healthy nails and creating beautiful manis?
Click here to view our full library of tutorials.
Get free dip nail help & tutorials every week!
Sign up for fresh nail inspo & exclusive discounts delivered right to your inbox!
By subscribing, you acknowledge our Privacy Policy.