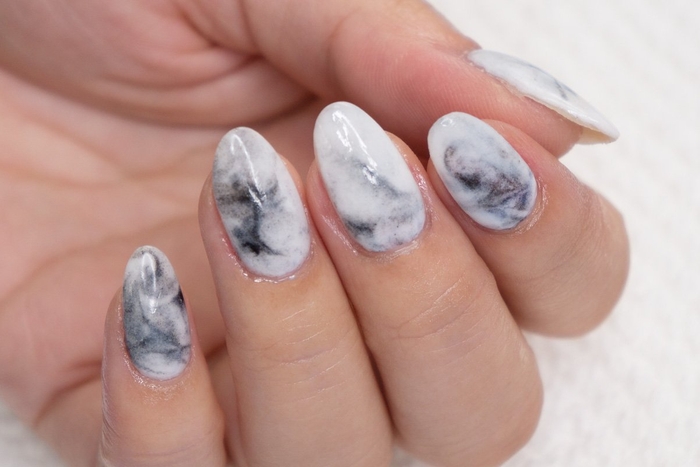
How To Do Marble Nail Art
Difficulty
Easy
Time required
45 Minutes
Salon price 
est. $93 / Mani
DipWell price
est. $4 / Mani
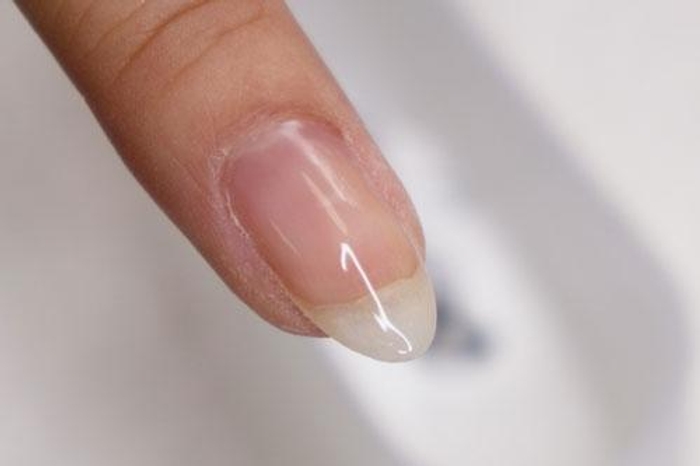
Step 1
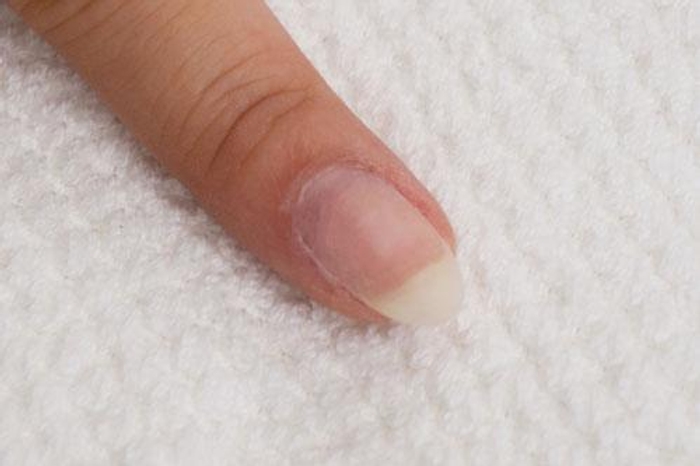
Prep Your Nails
- Shape & buff nails to desired look
- Sanitize hands, nails, and under the nails thoroughly
PRO TIP: To ensure your dip powder mani lasts 2-3 weeks, thoroughly prep nails to remove any oil, debris, or moisture prior to applying dip products. Use an oil-free hand soap.
Step 2
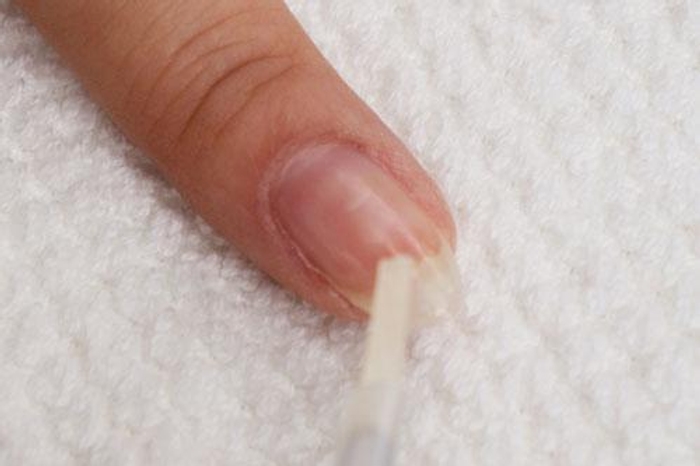
Apply Bond to All Fingernails
- Allow Bond to dry completely
- If your nails are prone to lifting, be sure to sweep an extra coat near the cuticle area
PRO TIP: Avoid touching nails to prevent distributing any unwanted oil onto the nail bed
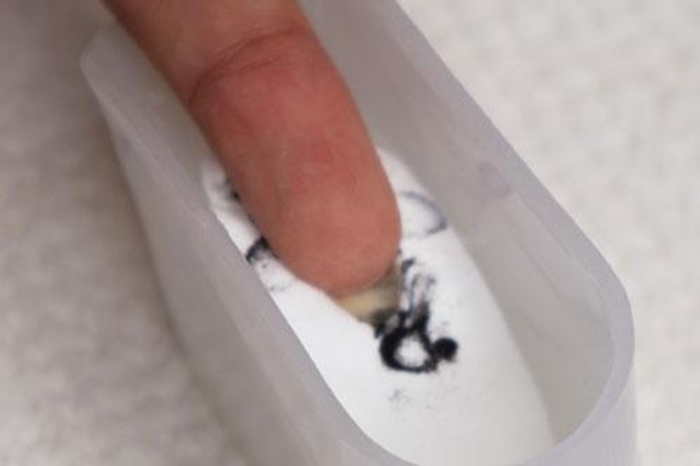
Step 3
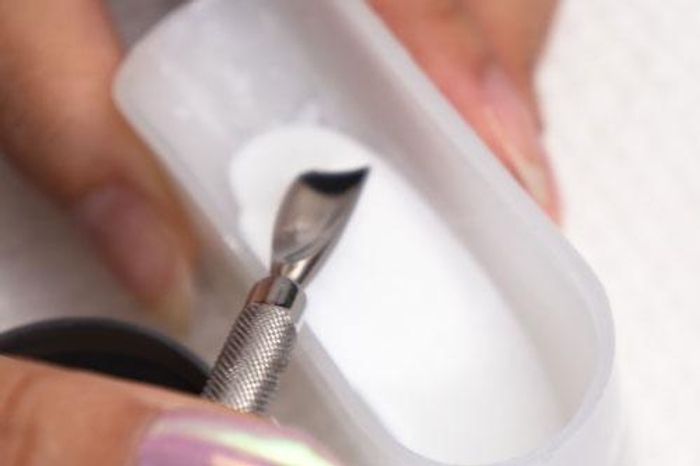
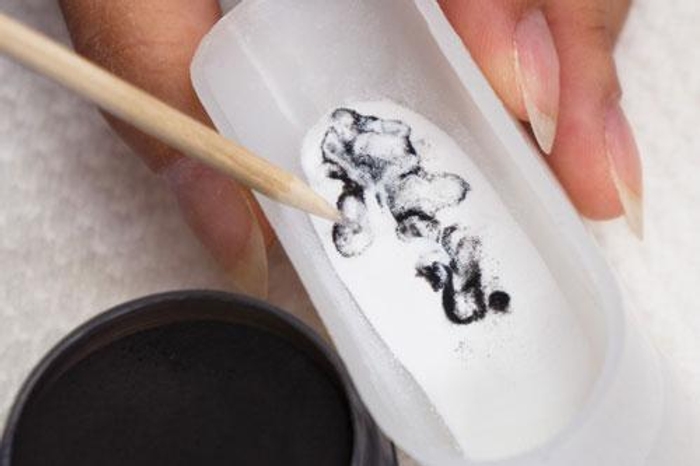
Prep Your Marble Design
- Pour French White & randomly place CL-64 in a dip tray or any open container
- Use a toothpick or pointed instrument to mix or swirl the powder, creating a marble effect
PRO TIP: Try not to over-swirl color powders together. The goal is to create a marbled stone effect.
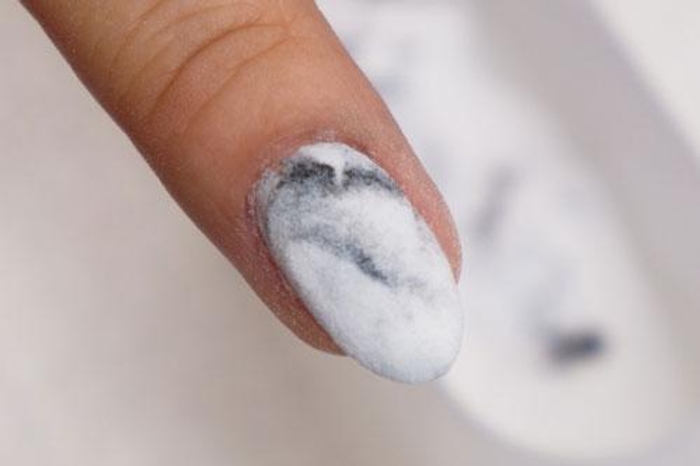
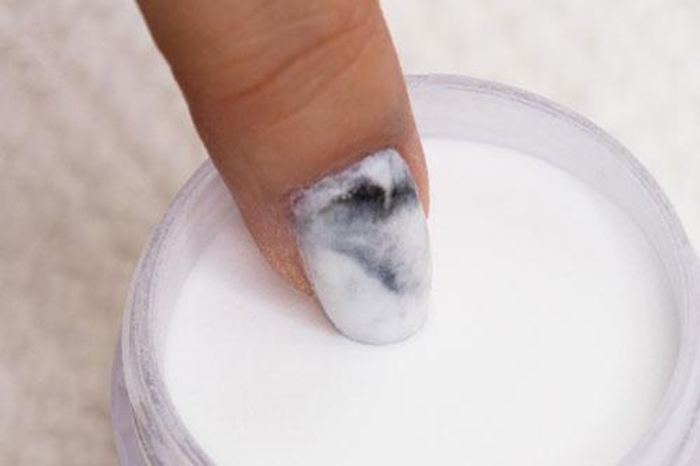
Step 4
Paint & Dip!
- Apply a thin coat of Base, starting halfway on the nail surface, stroking out towards the free edge of the nail (AKA nail tip)
- Quickly press the nail flat down onto the marble dip powder
PRO TIP: Be sure to paint and immediately dip only one finger at a time, before moving onto the next nail. Avoid getting Base onto cuticles as dip powder will pick up wherever Base is applied.
Get free tutorials, special deals every week!
Sign up for fresh nail inspo & exclusive discounts delivered right to your inbox.
By subscribing, you acknowledge our Privacy Policy.
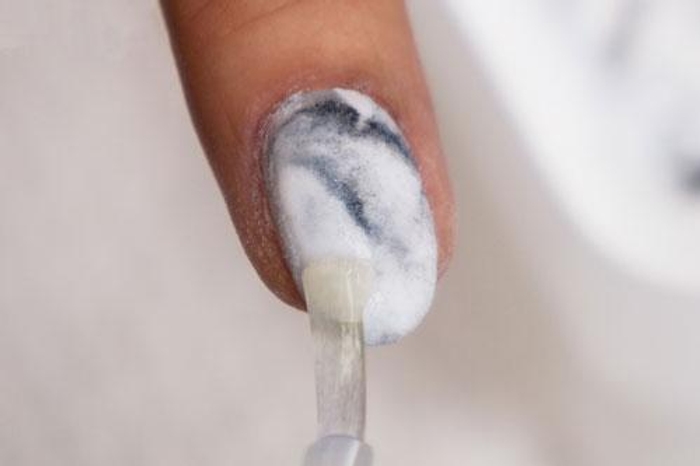
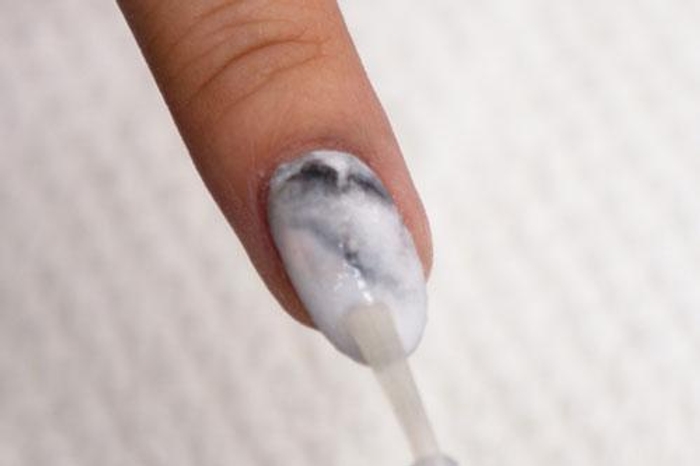
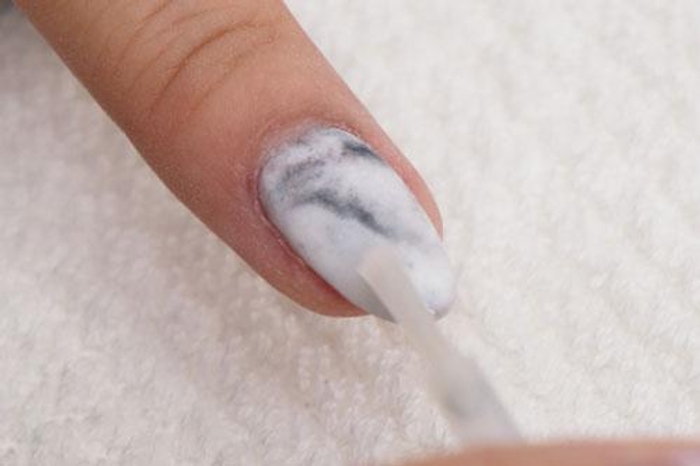
Step 5
Remove Excess Powder
- Tap finger gently to rid of any loose dip powder
- Wait 10-15 seconds for dip powder to settle, then use a fluffy brush to gently remove excess powder from the nail
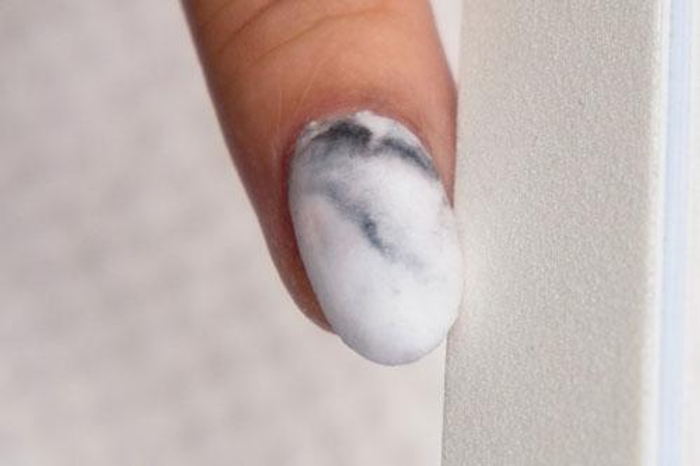
Step 6
And Repeat!
- Repeat steps 3-5 for more coverage, and to achieve your desired marbled effect & thickness
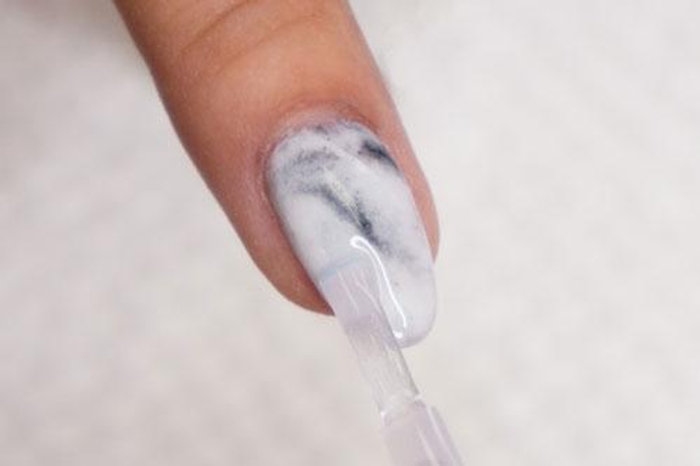
Step 7
Encapsulation Time!
- Apply another coat of Base to the entire nail surface & dip into Base & Finish Powder
PRO TIP: Be sure to paint and immediately dip only one finger at a time, before moving onto the next nail. Avoid getting Base onto cuticles as dip powder will pick up wherever Base is applied.
Step 8
Cure Your Dip Powder
- Apply a coat of Activator to cure (harden) the blend of dip powder & dip liquid
- Allow two minutes for Activator to cure nails completely.
PRO TIP: Without distributing natural oils from your fingertip, use the tip of your nail to press down onto the dip powder. If your nail does not leave an indentation mark, the blend of dip powder and dip liquid has fully cured and you're ready for the next step!
Step 9
Buff, File, & Shape Your Nails
- Use the 100/180 coarse grit nail file to spot-treat and even out any unwanted bumps or lumps. File down to your preferred thickness and shape.
- Use the 240 grit foam buffer to smooth out the nail surface
PRO TIP: The smoother the nails are buffed, the shinier the topcoat will look!
Step 10
Remove Nail Debris
- Wash hands & nails thoroughly or wipe with alcohol to remove any dust
- Be sure to clean every corner of the nails, including the cuticle area
PRO TIP: If washing hands, be sure to use an oil-free hand soap.
Step 11
Apply Second Coat of Activator
- Apply a second coat of Activator to prep for Sealer (Activator & Sealer react to each other to achieve a shiny finish)
- Allow two minutes for Activator to dry completely
PRO TIP: Use a lint-free wipe to remove any excess Activator that has not evaporated from the nail surface
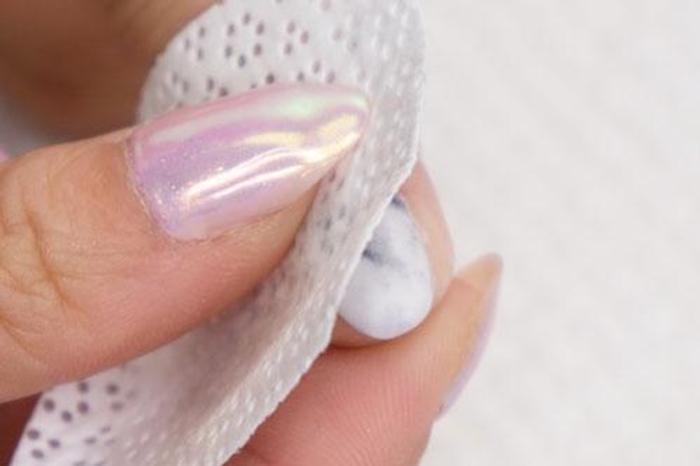
Step 12
Finish Off with Sealer
- Apply a thin coat of Sealer in quick strokes (no need to cover the entire nail as long as the majority of the nail is covered). Allow 2-3 minutes for Sealer to dry.
- Apply a thin second coat of Sealer. Allow 3-5 minutes for nails to dry completely.
Get free tutorials, special deals every week!
Sign up for fresh nail inspo & exclusive discounts delivered right to your inbox.
By subscribing, you acknowledge our Privacy Policy.