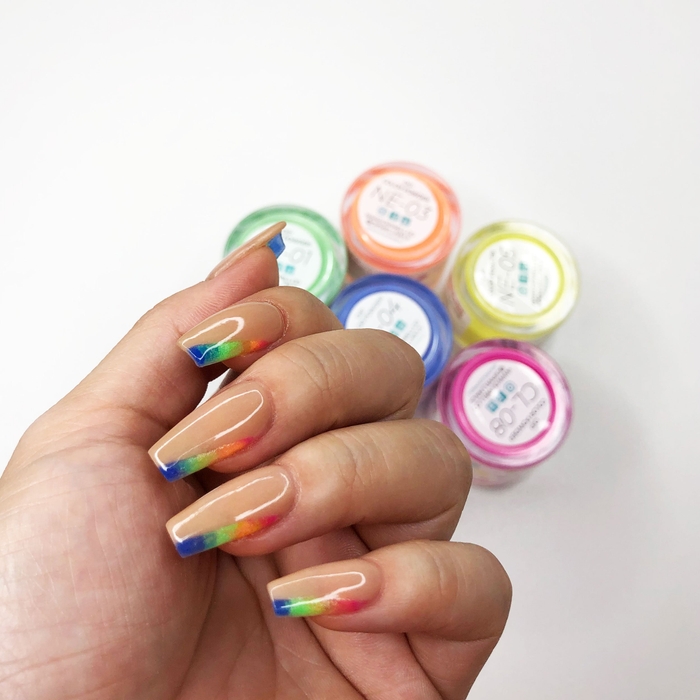
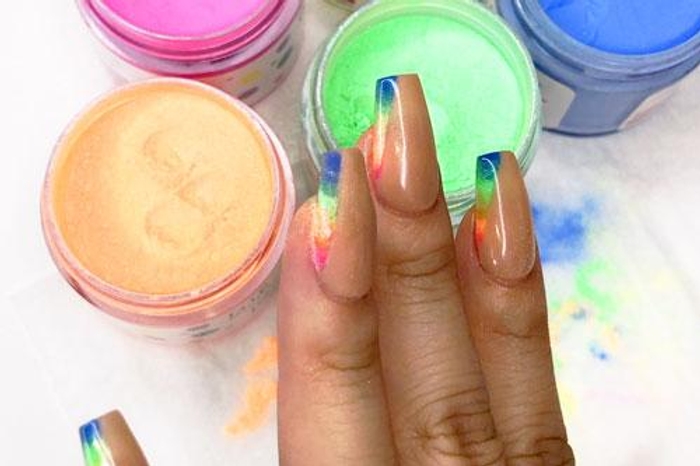
Rainbow Ombre Nails

Difficulty
Moderate
Time required
1 Hour
Salon price 
Est. $95
DipWell price
Est. $8
Step 1
- Apply a coat of Step 1 Bond to all fingernails
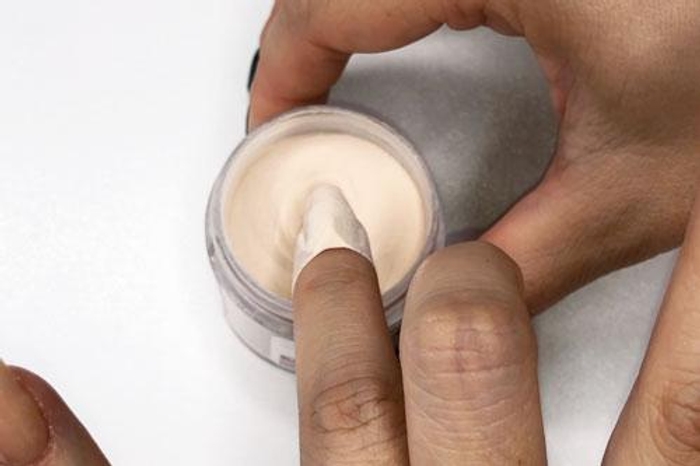
Step 2
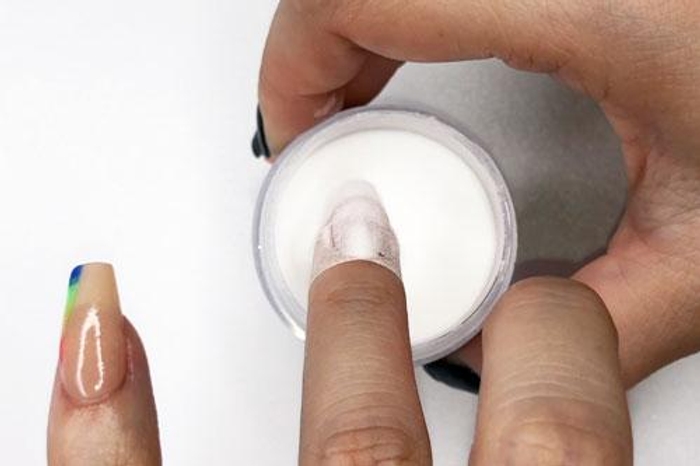
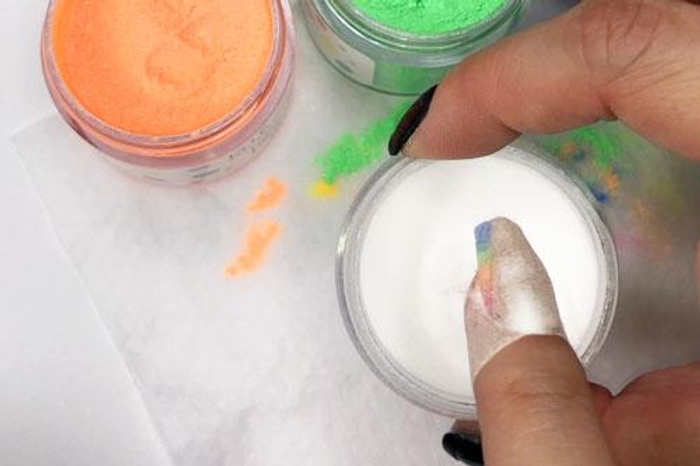
- Paint a thin coat of Step 2 Base and immediately dip finger into Base & Finish.
- Tap finger and use a fluffy brush to sweep off excess powder.
PRO TIP: Avoid getting the product onto cuticles, powder will pick up wherever Base if applied. Also make sure to tap off excess powder in between coats!
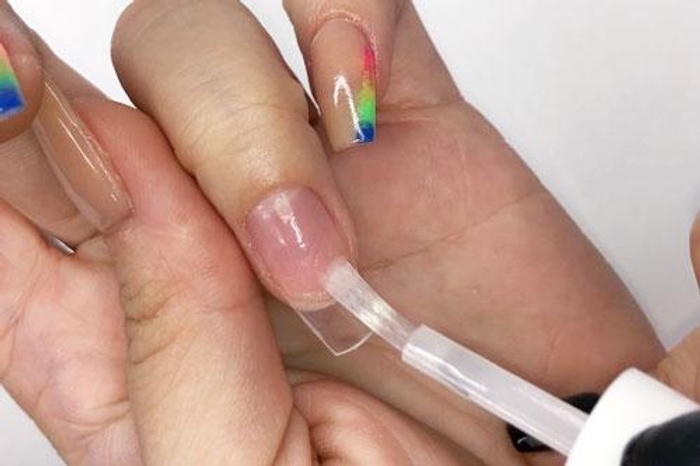
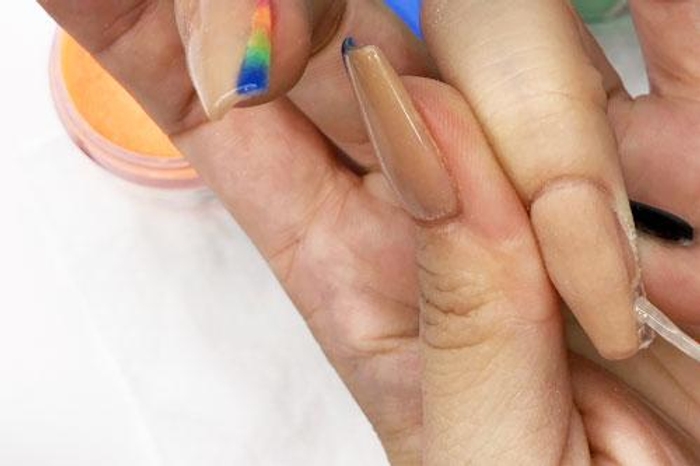
Step 3
- Carefully apply a second coat of Step 2 Base, leaving an unpainted strip along the left side of the nail. Then immediately dip at an angle into NA04.
- Repeat for more coverage, leaving the same strip of the nail bare.
PRO TIP: Over applied Base? Happens to the best of us. Make sure to wipe off the orangewood stick in between cleaning fingers to prevent build up ruining a mani.
Get free tutorials, special deals every week!
Sign up for fresh nail inspo & exclusive discounts delivered right to your inbox.
By subscribing, you acknowledge our Privacy Policy.
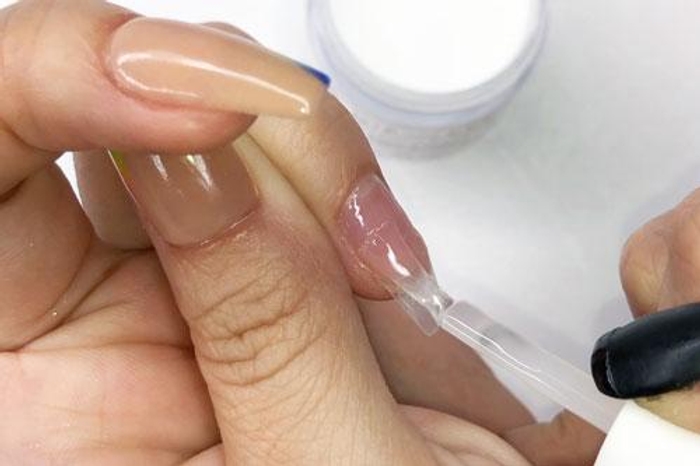
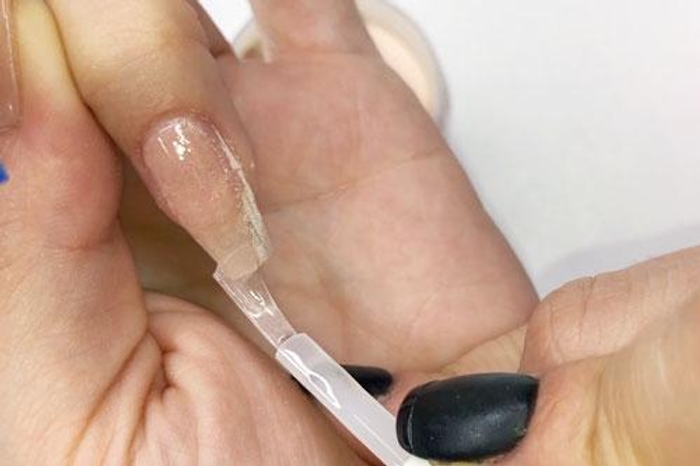
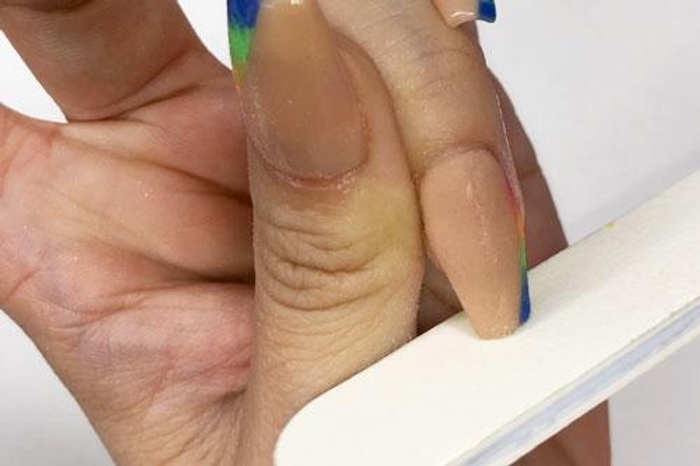
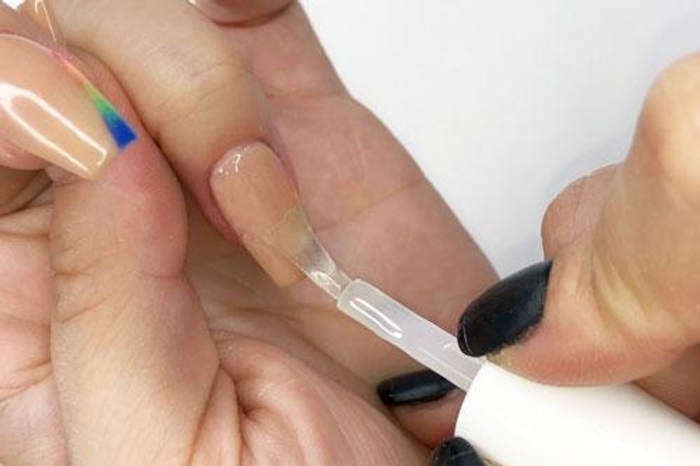
Step 4
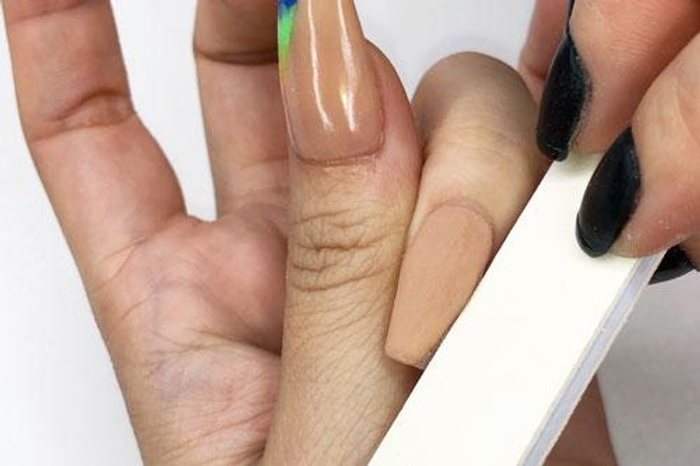
- Apply a coat of Step 3 Activator.
- Buff and shape the edge of NA-04 powder to create a clean divot for your rainbow effect.
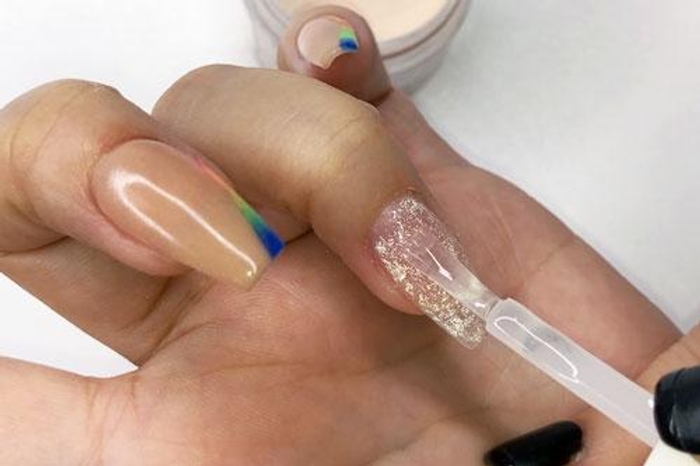
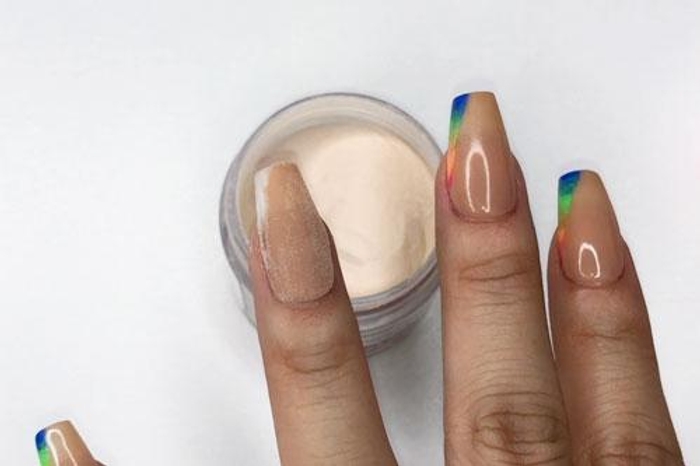
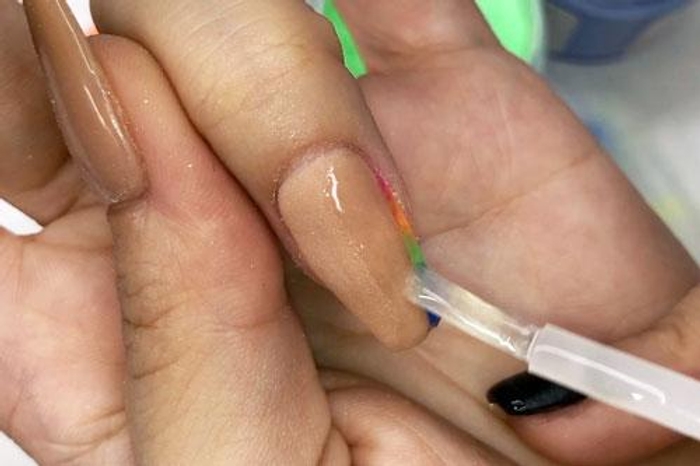
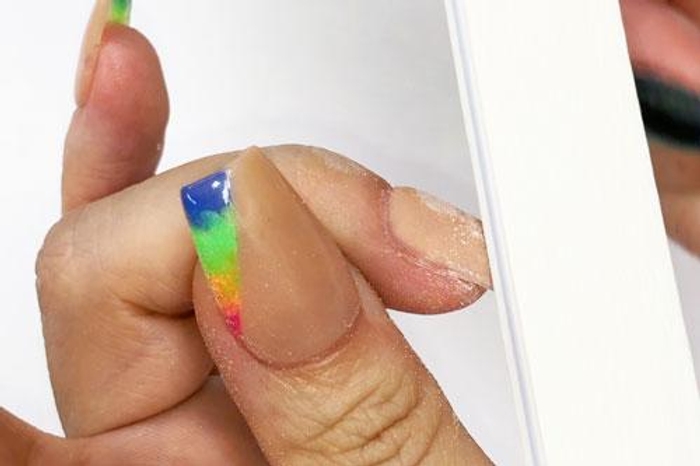
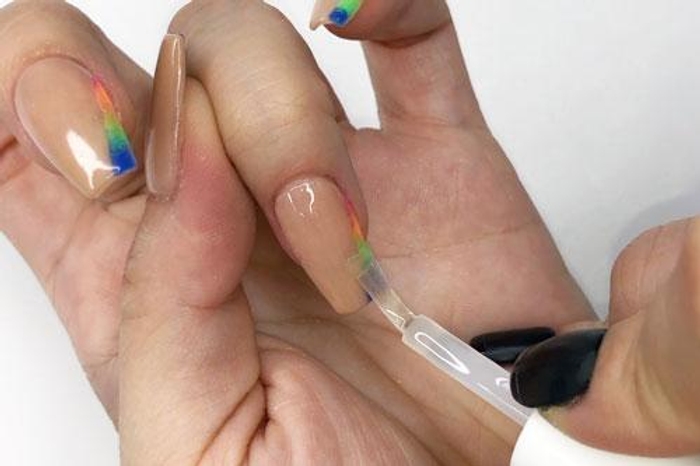
Step 5
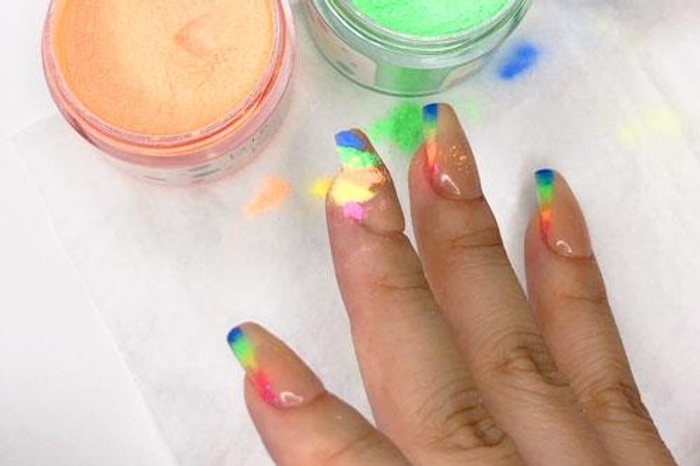
- Paint a coat of Step 2 Base onto the left section of nail & immediately spoon a small amount each of each color over the nail. Tap finger to rid of loose powder.
PRO TIP: Play around with color combos & different rainbow gradients! DipWell has over 180 colors to unleash your inner artist.
Step 6
- Repeat for more coverage, reversing the order of application each time.
PRO TIP: Reversing the order (top to bottom, bottom to top) helps create a layered & smooth ombre.
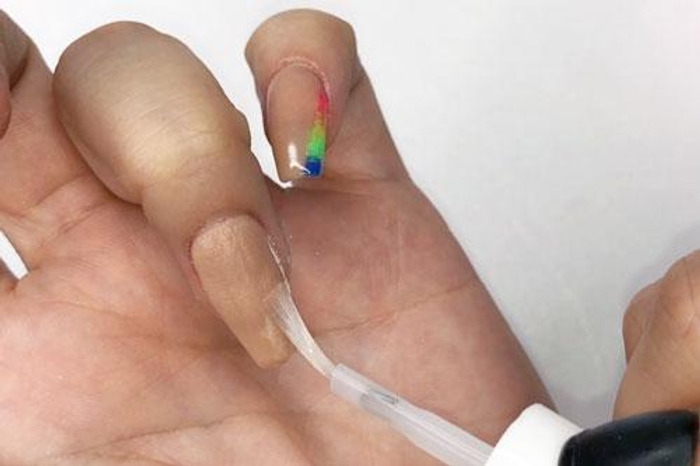
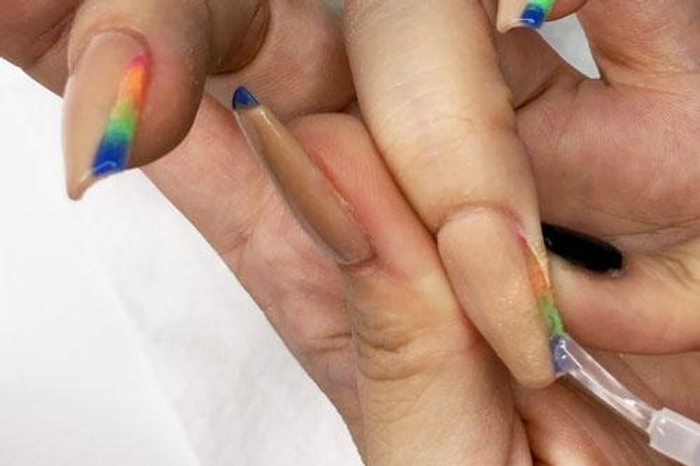
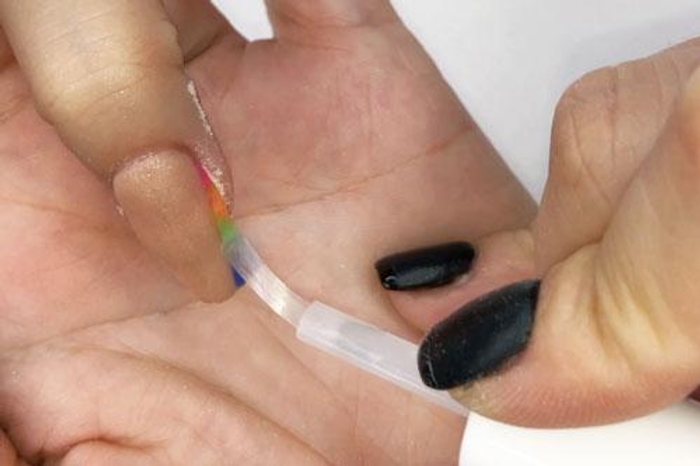
Step 7
- Paint a thin coat of Step 2 Base over the left half of the nail and dip immediately into Base & Finish powder. Tap finger to remove loose powder.
PRO TIP: Brushes may harden or pick up color powder during application. Simply switch them between Brush Softener for easy cleaning & workability.
Step 8
- Apply Step 3 Activator onto the nail and allow a few minutes for powder to harden.
- Then use our coarse grit buffer to even out the preferred thickness of the nails and the 240 grit buffer to smooth the nail surface.
Step 9
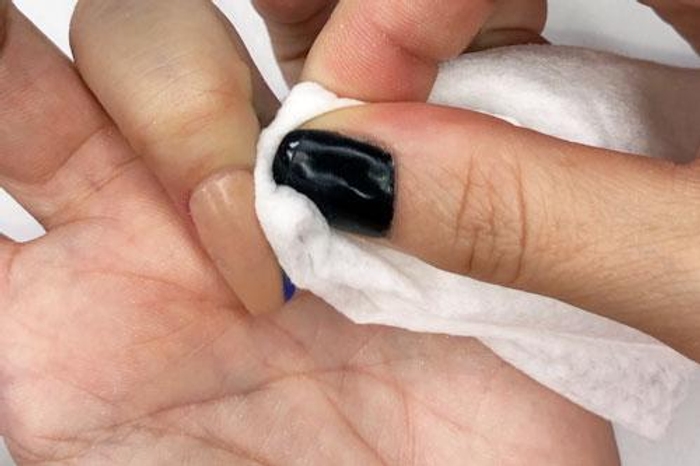
- Wash hands and nails thoroughly or wipe with alcohol.
PRO TIP: Make sure nails are completely dry before moving to the next step!
Step 10
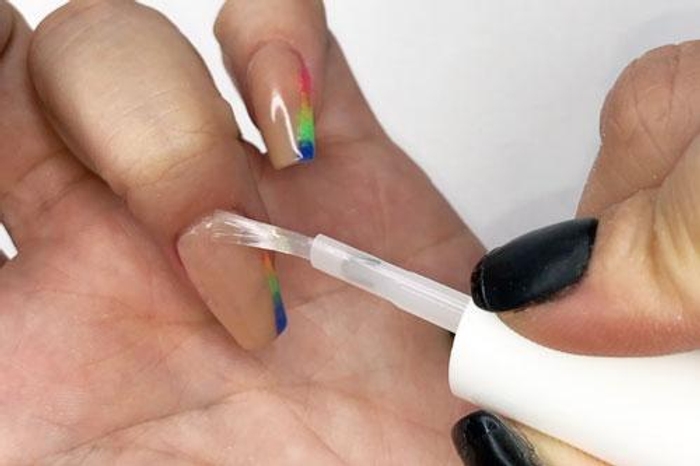
- Apply another coat of Activator and allow 3-4 minutes for Activator to completely dry.
Step 11
- Apply a coat of Sealer in quick thin strokes.
- Allow 3 minutes for nails to dry.
- Repeat for super shiny nails.
PRO TIP: Brushes may harden or pick up color powder during application. Simply switch them between Brush Softener for easy cleaning & workability.
Step 12
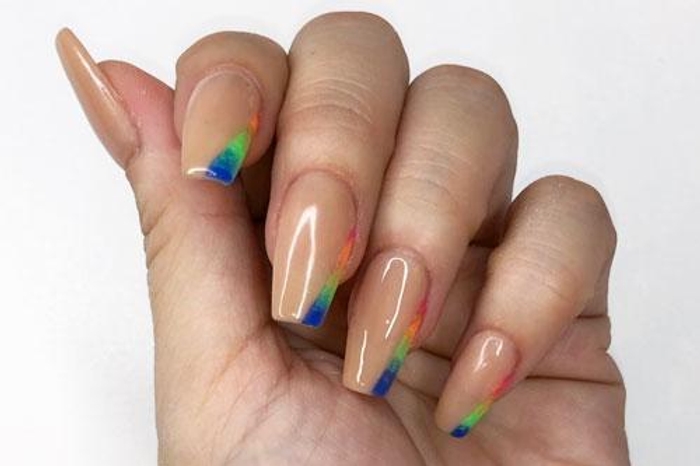
- TFW when summer is coming to a close but you still have so many bright, fun shades you want to use. 😩
- Keep summer going with this hidden rainbow!
Get free tutorials, special deals every week!
Sign up for fresh nail inspo & exclusive discounts delivered right to your inbox.
By subscribing, you acknowledge our Privacy Policy.