Matte looks are awesome - sometimes, but most of the time we love our nails shiny. Like, super shiny.
Our standard dip mani process is designed to give you great shine, but there are a few tips and tricks (and even an alternative application – Reverse Sealer Method!) you can use to ensure your nails achieve that luscious luster.
Time Your Coats
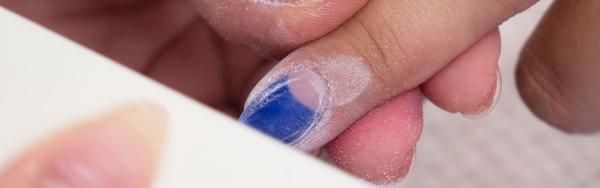
When applying the first coat of Step 3 Activator, be sure to wait 4-5 minutes for the blend of dipping powder and liquid to harden. You can make sure your nails are ready for the next step by lightly tapping on your nail.
Note: be careful when touching your nails through your entire mani process - you don’t want to transfer any natural oils from your fingertips onto your nails.
Get free tutorials, special deals every week!
Sign up for fresh nail inspo & exclusive discounts delivered right to your inbox.
By subscribing, you acknowledge our Privacy Policy.
Buff to Perfection
When the blend of dip powder has completely hardened, we recommend using a 100/180 coarse grit buffer to achieve your preferred nail thickness then using the 240/280 fine grit foam buffer provided in our kits to finish off smoothing the surface. The more the nail surface area is buffed with the 240/280 grit foam buffer, the smoother and shinier nails will appear after applying Step 4 Sealer.
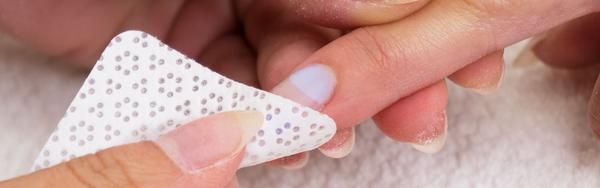
Keep it Clean
After buffing, use a lint-free cloth saturated with alcohol to wipe the nails clean. Be sure to get every crevice of the nails, including the surface area near the cuticles to remove any debris. Wait a few minutes for the alcohol to dry, before continuing.
PRO TIP: If you are washing your hands at this step, be diligent to let your nails dry thoroughly before moving on to applying the second coat of Activator. Although it may not be visible to the naked eye, your nails may still be wet beneath the top surface (dip powder is porous after all). This moisture can interfere with the Activator and Sealer reacting to each other appropriately and may result in foggy, or matte-looking nails... and we don't want that.
Watch Your Brush Technique
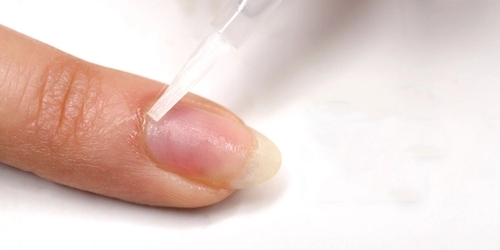
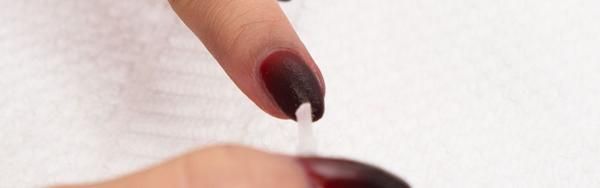
Apply the second coat of Step 3 Activator. Allow 4-5 minutes for the second coat of Step 3 Activator to penetrate the blend of dip powder (PRO TIP: use a lint-free wipe to remove any excess Activator on the surface of the nail) before applying Step 4 Sealer in quick thin strokes.
Don’t try to be an overachiever: you do not need to cover the entire nail with the first coat of Step 4 Sealer as long as the majority of the nail is painted. And be sure not to go over the same area of the nail where Step 4 Sealer has already been applied while on the first coat.

Did We Mention Timing?
Step 3 Activator and Step 4 Sealer are extremely temperature sensitive and time-dependent of each other. It is important to stay within the 4-5 minute time frame.
The brush used to apply Step 4 Sealer will harden if applied sooner than 4 minutes and nails may have streaks or appear slightly grainy or streaky if applied beyond 5 minutes.
Wait 3-5 minutes for the first coat of Step 4 Sealer to dry then apply the second coat of Step 4 Sealer as you normally would with regular polish, on the entire nail. Wait 3-5 minutes for nails to fully dry without touching or smudging.
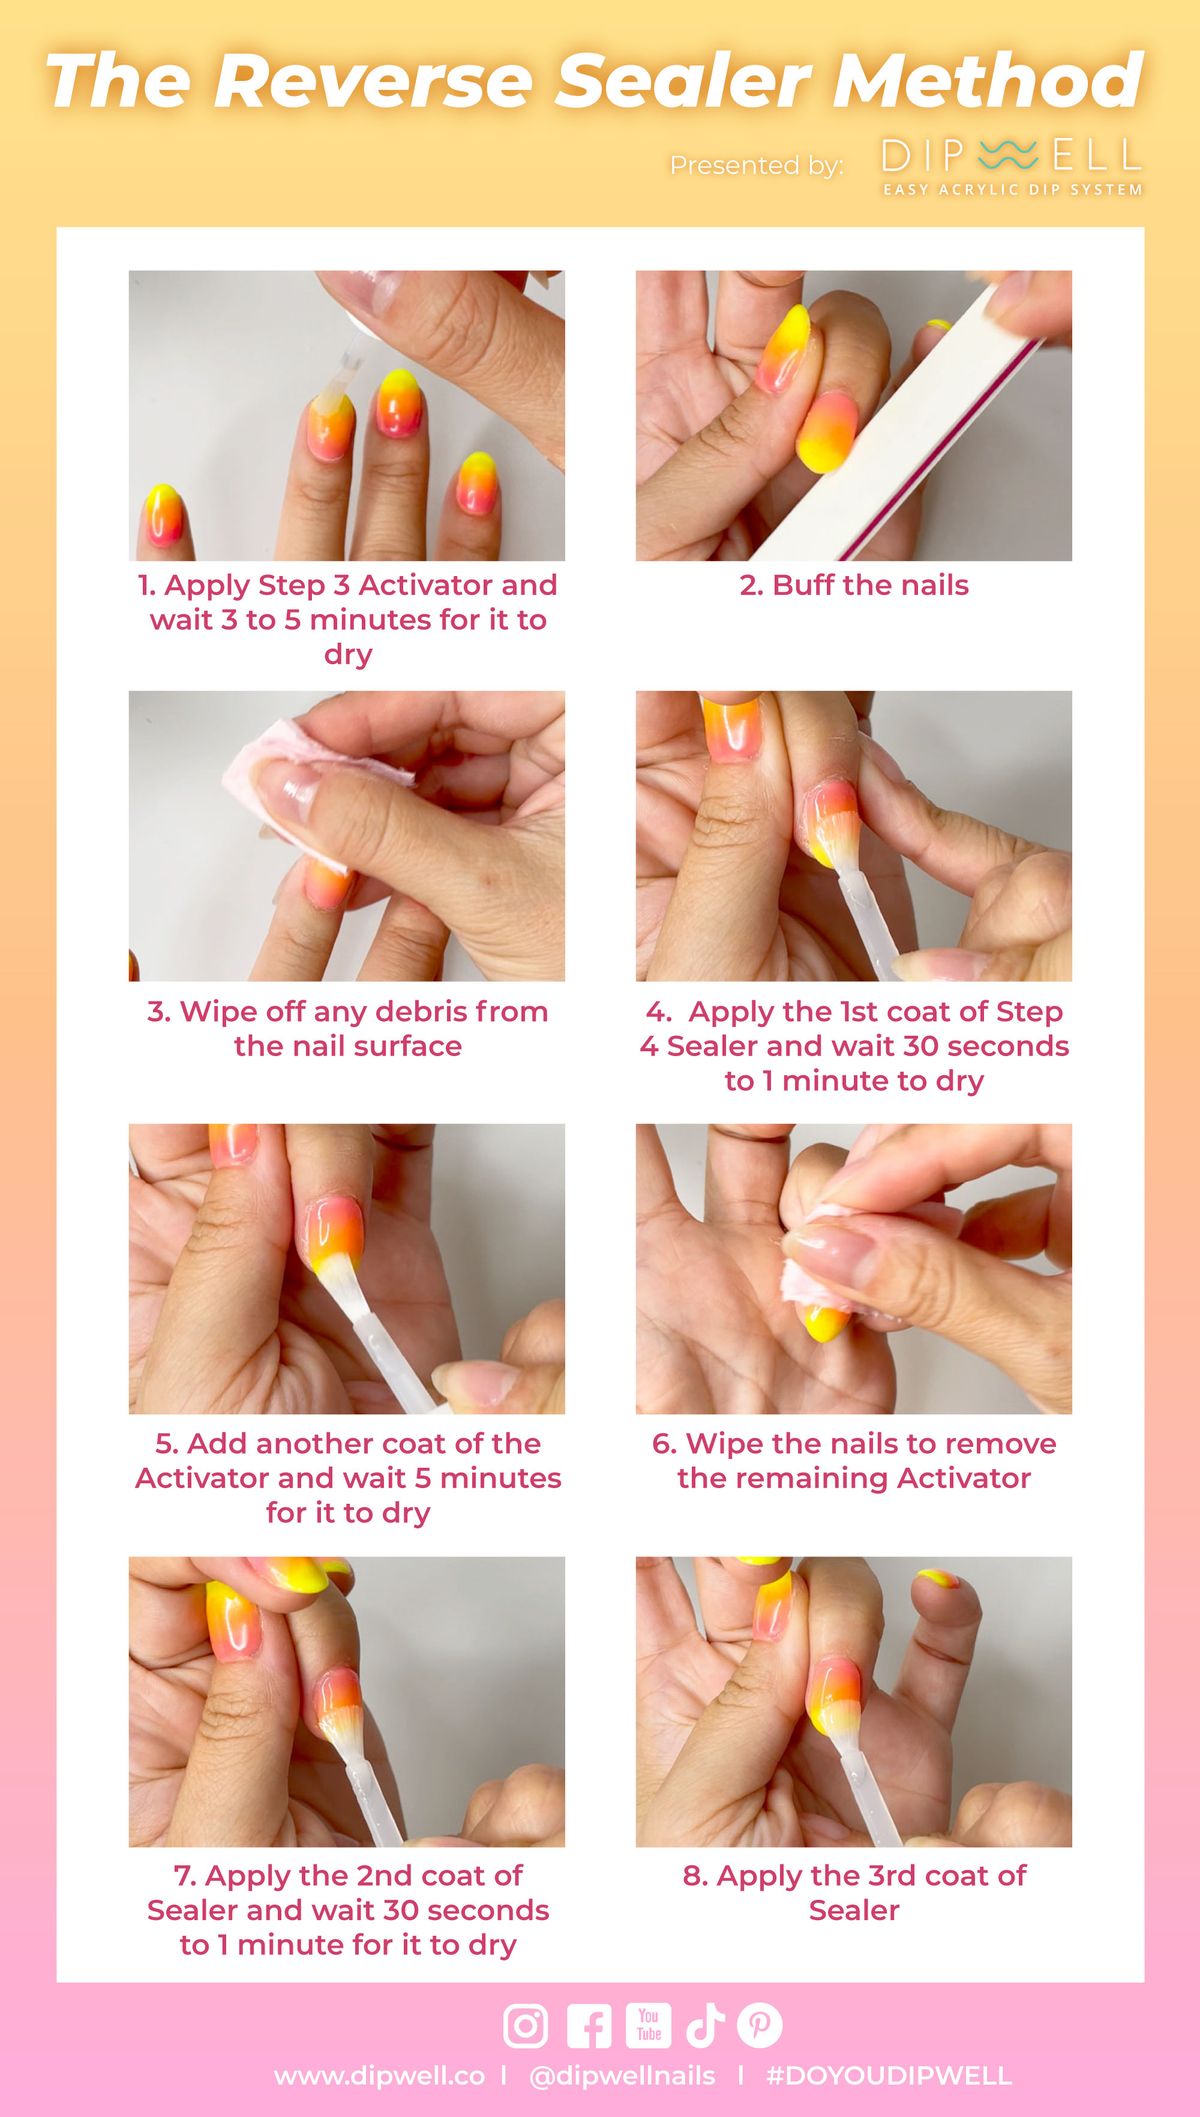
Alternative Dip Application: Reverse Sealer Method
If the standard dipping method is giving you trouble, try this alternative: The Reverse Sealer Method (RSM)
This updated method not only gives you shinier and smoother dip nails, but it significantly reduces any cross-contamination issues and frustrations you may have. An even bigger bonus? It’s extremely beginner-friendly.
Here's how it works:
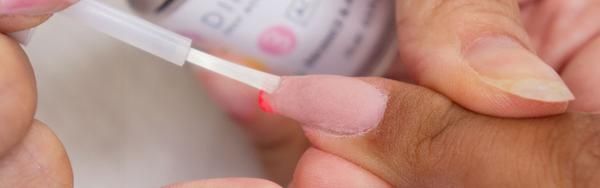
- Apply Step 3 Activator
- Buff the nails
- Wipe off any debris from the nail surface
- Apply the first coat of Step 4 Sealer
- Add another coat of the Activator and wait five minutes for it to dry
- Wipe the nails to remove the remaining Activator
- Apply the second and third coats of Sealer
DipWell's Dipper Club members agree: this method is a game changer!
If you've had problems with your Sealer, think getting ripples or the liquid not drying quite right, then the Reverse Sealer Method is the solution that will give you consistent, shiny results for sure. Just don't apply more than two consecutive coats of Sealer to avoid uneven drying and a gummy mani. For a video tutorial breakdown on the Reverse Sealer Method, click HERE.
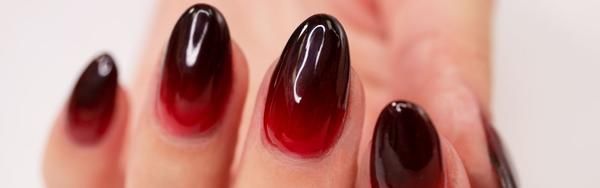
Get Out Your Sunglasses
‘Cause your nails are gonna shine like the top of the Chrysler building.
Dip powder manis can be easy, but sometimes there’s a learning curve. For more tips on avoiding common dip nail mistakes, see our articles on how to prevent lifting, and how to avoid the “dip flu”.
And for ideas on creating gorgeous looks with your DipWell Kit, we’ve got a full page of step-by-step tutorials. Then tag your unique look with #DoYouDipWell - we’d love to see your creativity in action!
Get free tutorials, special deals every week!
Sign up for fresh nail inspo & exclusive discounts delivered right to your inbox.
By subscribing, you acknowledge our Privacy Policy.