Featured shade: NE12
Is this blog TLDR;? Here's a quick link to our tutorial.
Wish your nails were just a little longer? Or used to getting super-long acrylics at the salon, and not sure how to replicate your favorite look at home?
We’ve got all the info you need to transform your nails with faux tips, right at home.
There are a lot of videos and word-of-mouth ideas about applying artificial nails with your dip manicure - but a lot of it is mis-information. So we’re here to set the record straight, and give you our pro method for getting the best results.
When to Use Faux or Artificial Nail Tips
When you want longer nails
This probably goes without saying, but the easiest way to get gorgeous long nails is to enhance your own with faux tips. They give you a light, natural look and wear comfortably for weeks. Whether you favor long nails for everyday, or just for special occasions, they’re the perfect way to add instant length.
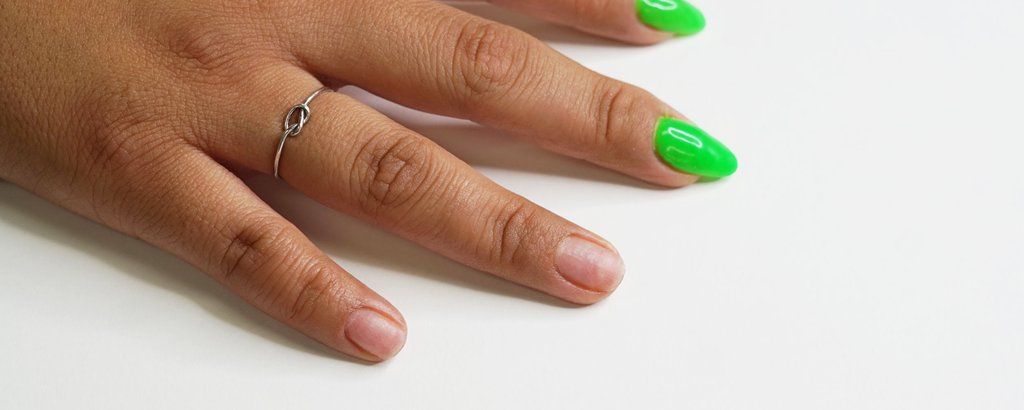
When you have a broken nail
It happens to all of us eventually - you’ve been growing out your natural nails and they look amazing. And then, one of them breaks. Cue the tears!
The good news is you don’t have to wait for it to grow back to have a full set of long nails, you can use an artificial tip on just the nail(s) that need it. And we’ll give you all the directions you need to make your faux-helped nails blend in with your natural nails.
When you’re trying to curb a biting habit
Longer faux nails are a great way to interrupt a nail biting habit. And they look beautiful, too! If this is your first time trying this approach, don’t worry - we’ve got your back. Read on for easy instructions!
Get free tutorials, special deals every week!
Sign up for fresh nail inspo & exclusive discounts delivered right to your inbox.
By subscribing, you acknowledge our Privacy Policy.
Step 1: Gather your supplies

You know that feeling when you’re making cookies: the butter and sugar are creamed and fluffy. You go to the fridge for an egg… and they’re all gone. Ugh!
Save yourself interruptions and hassle by laying out all your mani supplies first:
Step 2: Attach nail tips
As always, wash hands, fingertips, and under the nails well before performing any type of nail application or removal process.
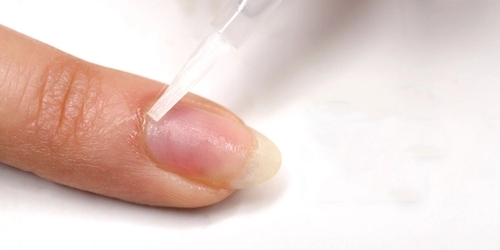
- Prep nails according to instructions and apply a coat of Step 1 Bond at the edge of the natural nail tips.
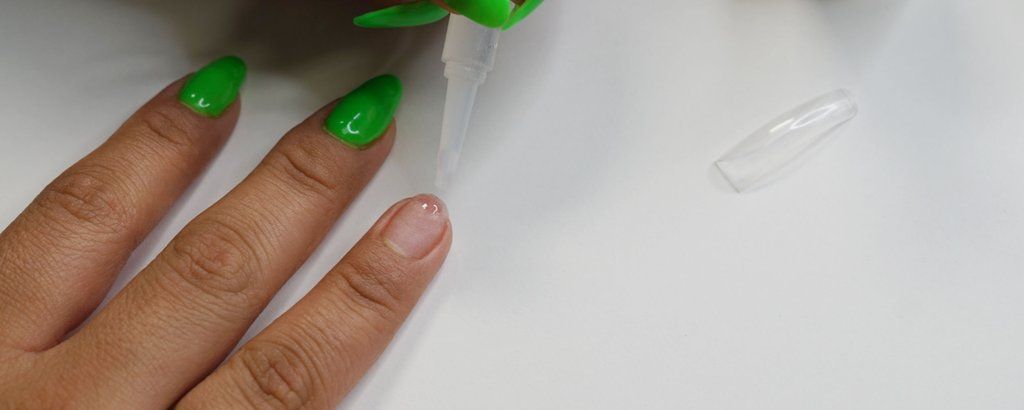
- Apply a small amount of nail glue to attach the faux nail tip - being careful not to miss the sides. A small amount of glue goes a long way! There’s no need to be too generous with it. In fact, if you’ve had trouble with staying power, you might want to test decreasing the amount of glue you’re using.
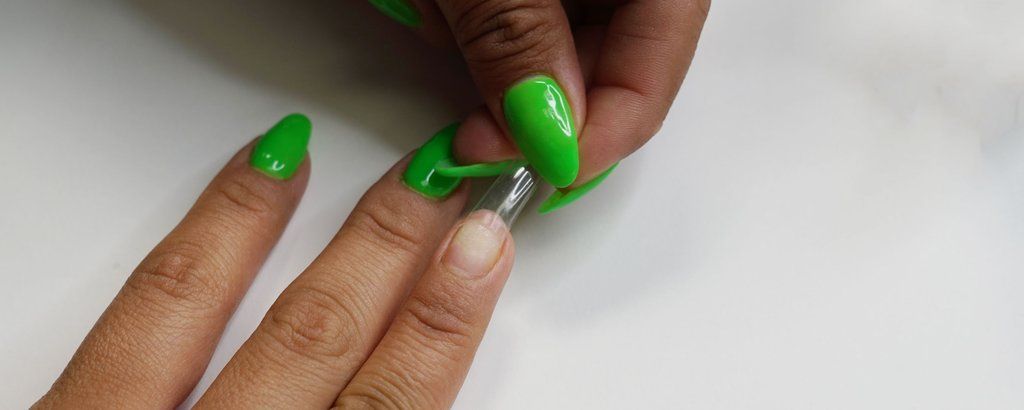
- Press and hold the faux nail tip to the natural nail. Wait a couple minutes for the glue to set, then trim faux nail tips to your desired length. This is also the time to shape and file your nails.
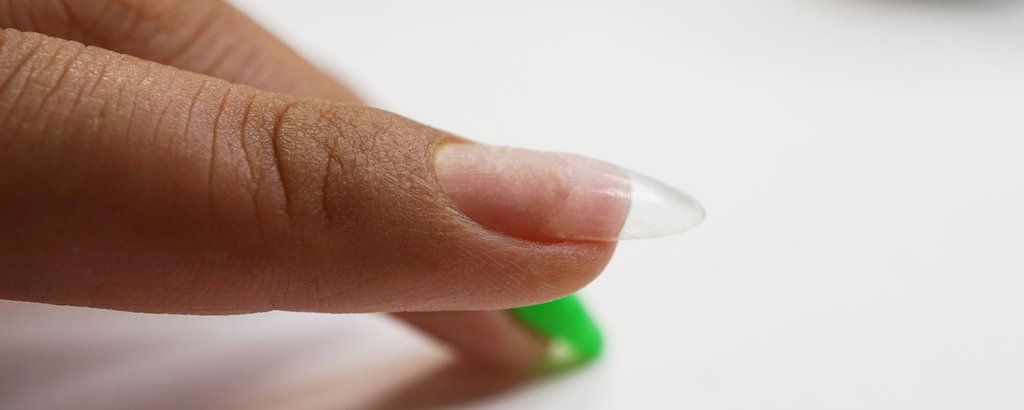
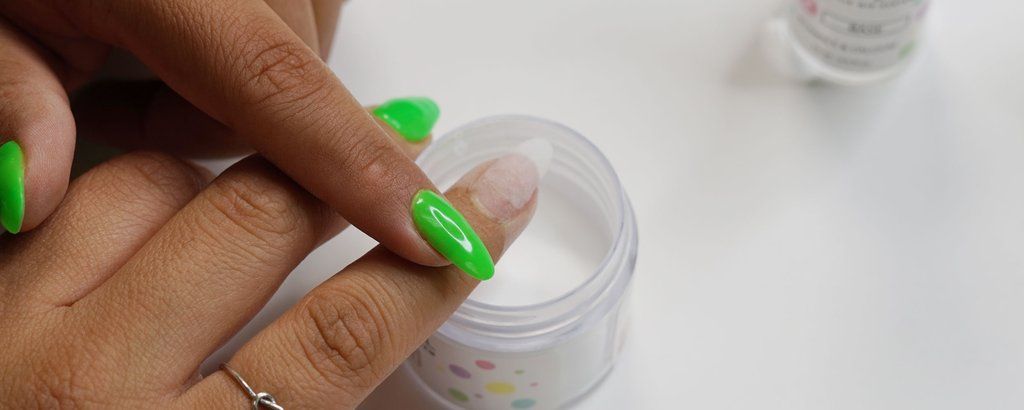
- Buff the entire nail (natural & faux tip) with 180 grit buffer just enough to create a rough surface for the dip product to adhere to. Over-buffing will thin your natural nail, which we don’t want. Moderation is key. You can also use the buffer to gently push back your cuticles from your nail plates.
PRO TIP: Especially buff down the area where the faux nail tip meets the natural nail to an even surface. The goal is to smooth out the faux nail tip to the natural nail to create a nice, even foundation for smooth dip powder application.
Step 3: Start your dip process the right way
Read carefully! This is the part that’s unique to faux acrylic tips:
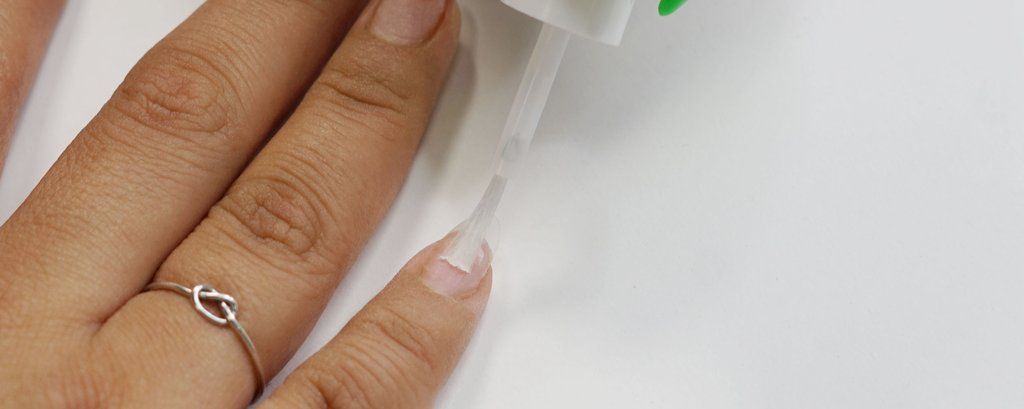
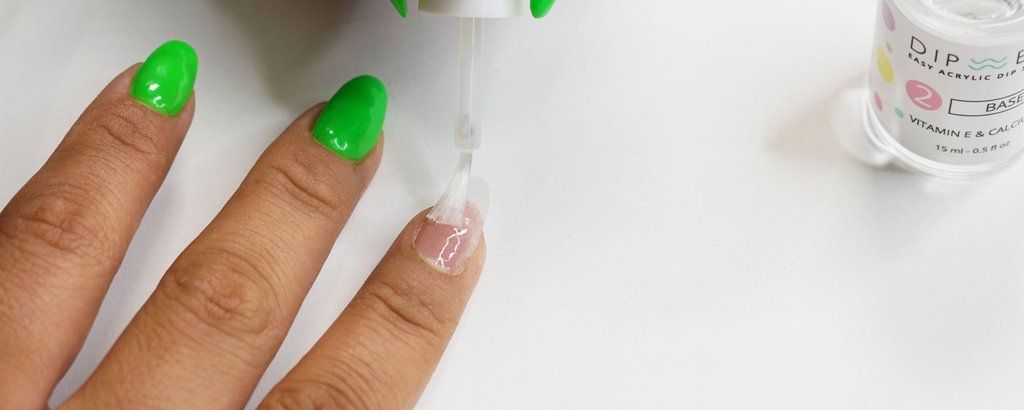
- Before starting dip application, sweep a generous coat of Step 1 Bond to the entire natural nail area, especially at the line where the faux nail tip meets the natural nail. This gets rid of oiliness that may prevent dip products from adhering.
- Allow 1-2 minutes for Step 1 Bond to set.
For best results, the next steps are to be applied in sequence one finger at a time.
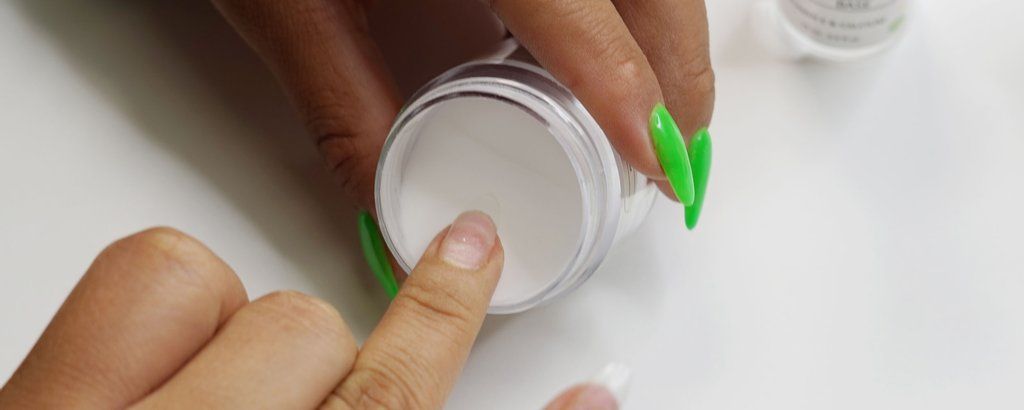
- Apply Step 2 Base halfway on the natural nail and sweep out to the free edge of the faux nail tip
- Immediately dip fingernail into Base & Finish Essential Powder.
- Repeat these steps until all nails have been dipped
Step 4: Continue with standard dip steps
- After all 10 fingers have been dipped, wait 15 seconds for powder to set into Step 2 Base.
- Use a fluffy brush to dust off excess powder from the nail surface and fingertips ← This is what keeps your nails nice and smooth… rather than accumulating too much product and getting too thick!
- Optional step: If you’re looking for better retention, add in a second coat of Step 2 Bbase (close to the cuticles this time) and immediately dip into Base & Finish Essential Powder. If your focus is on achieving thin nails, skip this step.
- Be sure not to get Step 2 Base on cuticles as it will cause lifting and prevent dip nails from lasting as long.
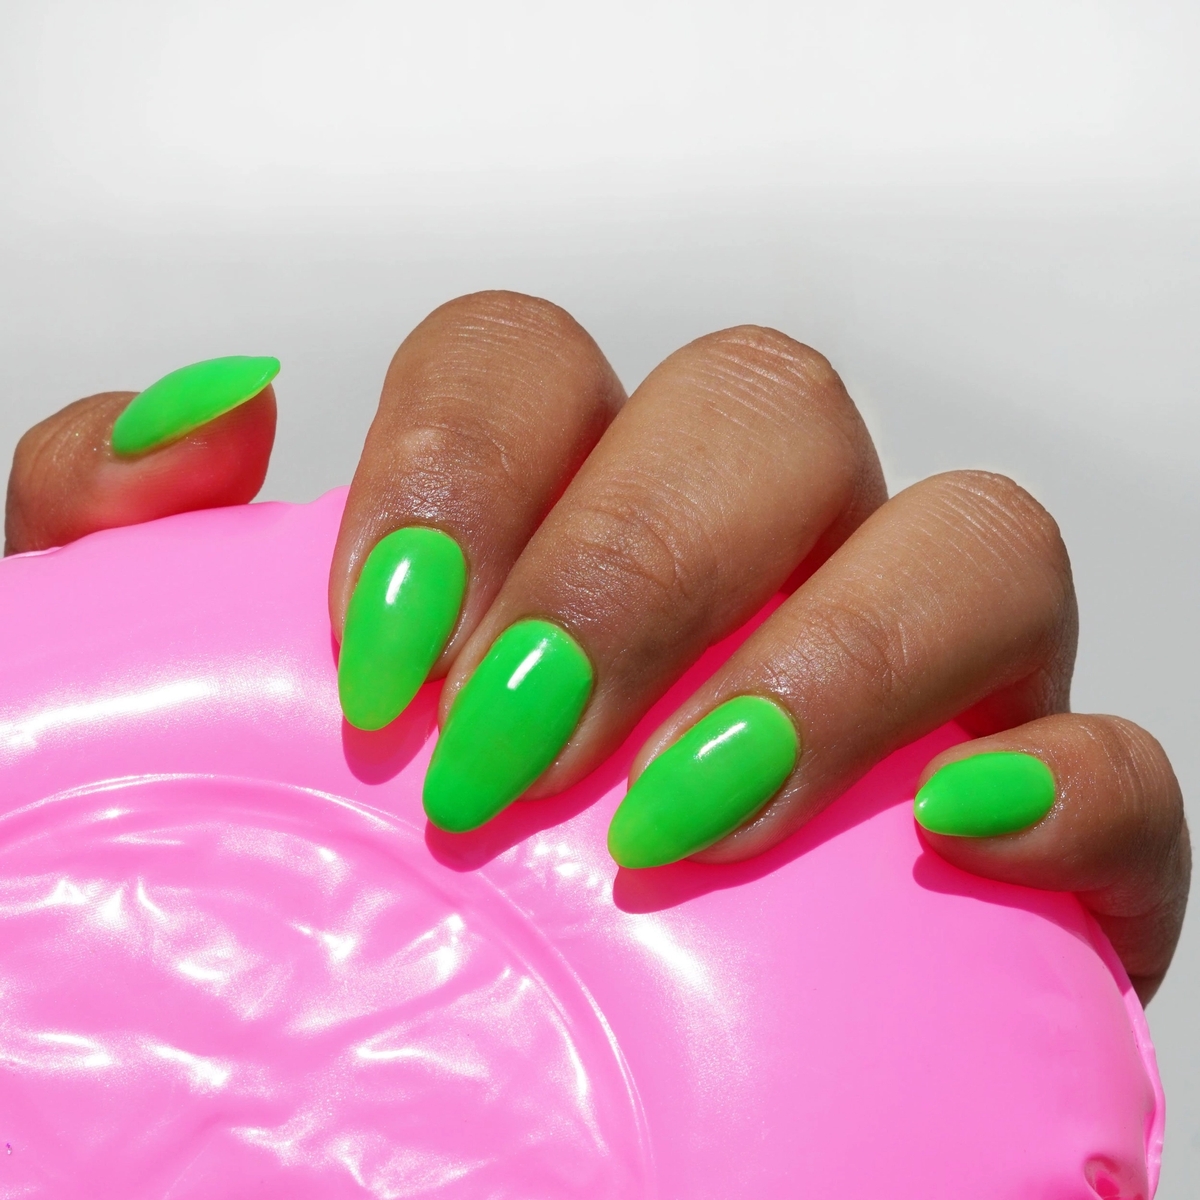
Step 5: Choose your own color adventure!
Once the entire natural nail and faux nail tips have an even layer of Base & Finish Powder, continue the next steps as per instructions for color or French pink & white dip application.
Before you know it, your mani will be ready to take on the world with gorgeous, glossy nails that’ll last up to 6 weeks without chipping.
Thank you for reading our 'How-to'! Now that you know how to apply artificial nail tips, here's a promo code for 10% off to get started!
- NAILTIPS10 -
Exclusions Apply | Not Valid on Kits
Get free tutorials, special deals every week!
Sign up for fresh nail inspo & exclusive discounts delivered right to your inbox.
By subscribing, you acknowledge our Privacy Policy.