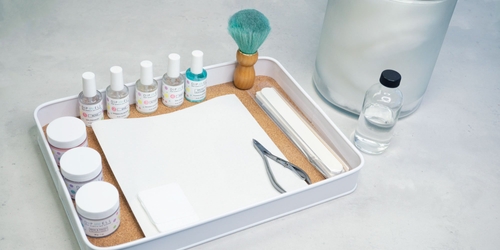
Insta-worthy dip nails can't be achieved without Marie Antoinette's favorite nail care tool: the nail file.
As seen on our DIY dip mani tutorials, we use an electric or manual nail file for:
(1) Nail Prep: Set yourself up for success by buffing away your invisible cuticles, and creating a rough nail surface to prevent lifting
(2) Shaping/Buffing: Get your desired nail shape and mani finish by buffing down your dip powder before applying Sealer
Looking for a beautifully long-lasting manicure that require almost zero buffing? Try out the DipGel Kit! Get the same durable and gorgeous nails you love using self-leveling liquids that give you a perfectly smooth mani – every time.
In the history of nail polish, we've discovered that Mary E. Cobb was the inventor of the emery board files we’ve grown up seeing in drugstores. Today we're going beyond history. We're talking about the essentials of electric nail drills and the nitty-gritty of manual nail files.
The Essentials of Electric Nail Drills
Get free tutorials, special deals every week!
Sign up for fresh nail inspo & exclusive discounts delivered right to your inbox.
By subscribing, you acknowledge our Privacy Policy.
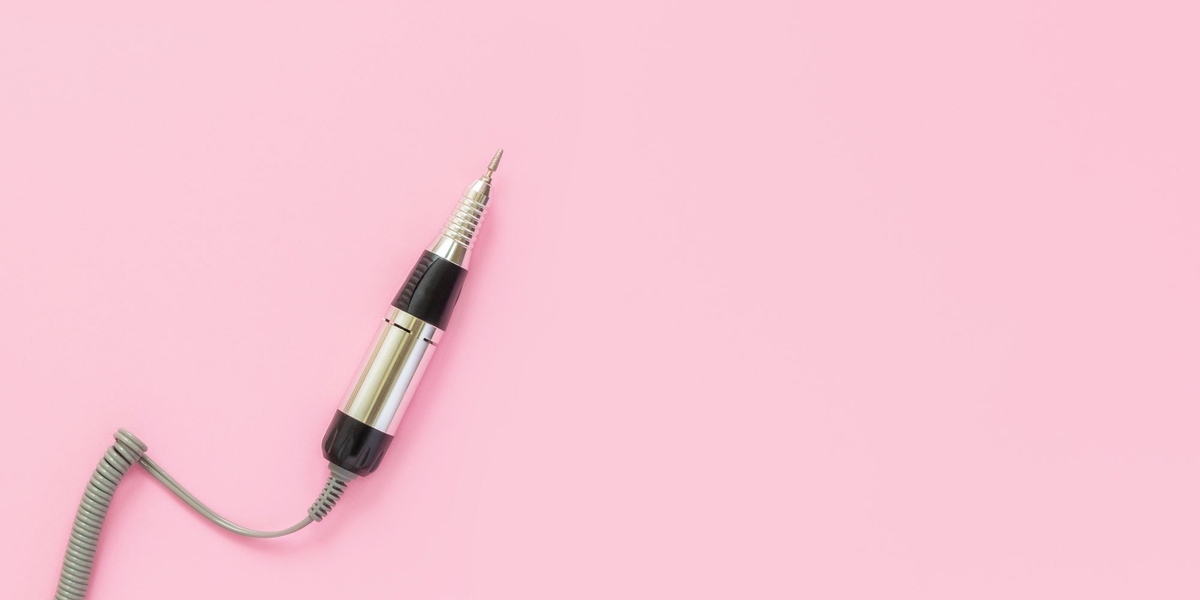
What is an electric nail drill?
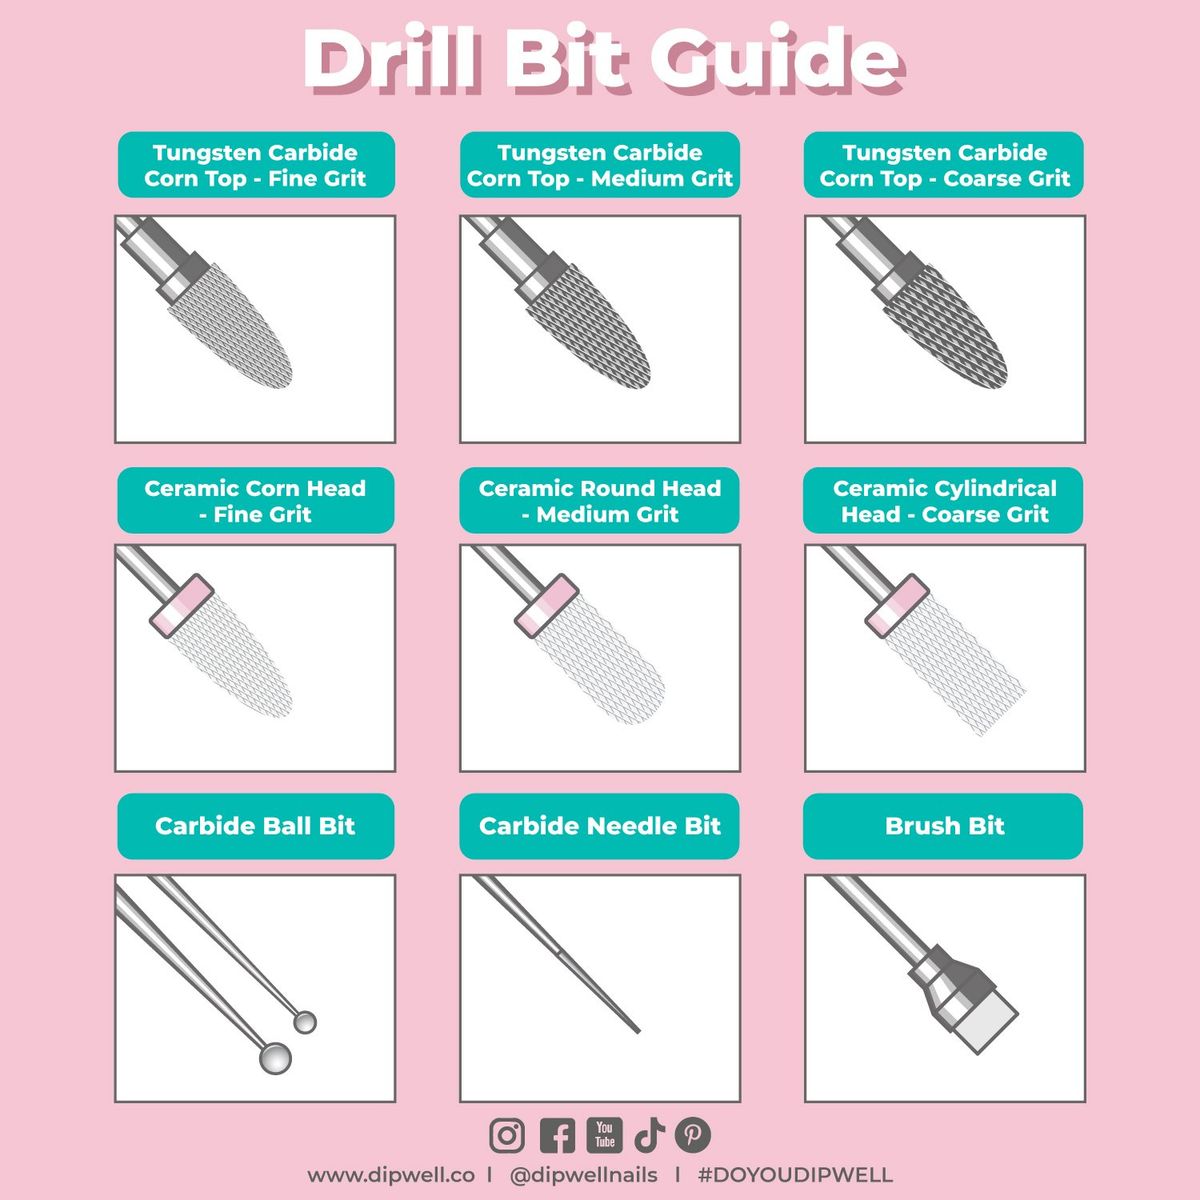
An electric nail drill or e-file is an electric-powered rotary tool used for filing nails or removing nail enhancements. To do specific jobs, a nail drill would need "bits". These coated drill tips come in various grits, materials, sizes, and shapes. You have choices of carbide bits, diamond bits, ceramic bits, among others.
- CARBIDE BITS: For cutting or shaping gel and acrylic nails by shaving off layers of the mani
- DIAMOND BITS: For removing product build-up by scratching off the nail surface
- CERAMIC BITS: For the same purposes but with less friction and heat
How do you use an electric nail drill?
Before you drown yourself in a sea of choices, let's summarize how or when to use each bit in a basic 10-piece set of nail drill bits.
- FLAME BIT: For creating an apex and cleaning around the cuticle area
- NIB BIT: For removing hangnails, gently lifting the eponychium—the nail fold at the base of the nail plate—and other delicate cuticle work
- SAFETY BIT: For doing surface and infill cuticle work, backfill cutting, and shortening
- BALL BIT: For cleaning sidewalls and under the nails and prepping for backfills
- MICRO BALL BIT: For safely removing dead skin and making cuticles and nails clean
- FLAT-END CYLINDER BIT: For removing shine from surface area and side grooves
- NEEDLE / THIN NEEDLE BIT: For filing away residual cured gel or cuticles in hard to reach areas, under the nails, sidewalls, and backfills
- SILICONE BIT: For polishing nail surface to make the nail smoother
- CLEANING BRUSH: For cleaning nail surface and drill bits

A friendly reminder from Sine, Licensed Cosmetologist and DipWell's Community Educator:
"E-files do require some training, learning safety measures, and practice. Proper use of how to use an electric nail drill and the bits safely is especially important to avoid nail damage. If you use an electric nail file and it starts to cause you pain, stop immediately. This should not happen if it is used correctly. You never want to use the e-file on the natural nail. The natural nail should only be filed with a light hand and 180-grit file or higher."
If you're a DIY dip mani newbie, we recommend sticking with manual nail files. But if you're keen to power up your nail care routine with an e-file, we can't stress enough how important it is to learn, learn, and learn some more. Refer to your nail drill's manual. Read up on how to set up electric nail files, including safety tips. You can also head over to YouTube and watch "how to use a nail drill" instructional videos. A thorough understanding of how to operate electric nail drills will prevent damage to your nails and potential trips to your doctor. Always better safe than sorry.
The Nitty-Gritty of Manual Nail Files
What is a manual nail file?
This is the most user-friendly nail file that comes in many forms.
- EMERY BOARDS: The most common manual nail file that's made of cardboard and usually has different grits on its two sides.
- WOODEN NAIL FILES: These are similar to emery boards, but they are made with wood as opposed to cardboard. They are also available in different grits.
- BUFFING BLOCKS: They come in a variety of grits and sizes (regular and mini).
- METAL NAIL FILES: These manual nail files are made of stainless steel and can be a bit harsh for natural nails. They are more suited for nail enhancements.
- SPONGE BOARDS: These are extra thick cushion manual nail files that are made with no paper backing. They are available in a variety of grits and can be sanitized and disinfected.
Choosing the best-for-you manual nail file comes down to what your needs are with the nail file grit as the main criteria.
What is the nail file grit number?
"The file grit number refers to the abrasiveness of the nail file. You want to choose the correct grit nail file so you don’t damage your natural nail bed," says licensed cosmetologist Sine.
How do you know if your nail file has a low or high grit number? Run your finger over the nail file and feel the particles. A low grit nail file is more abrasive, while a high grit nail file is smoother.
She also recommended the guideline below:
- LOW GRIT NUMBER: For artificial nail enhancements
- HIGH GRIT NUMBER: For natural nails
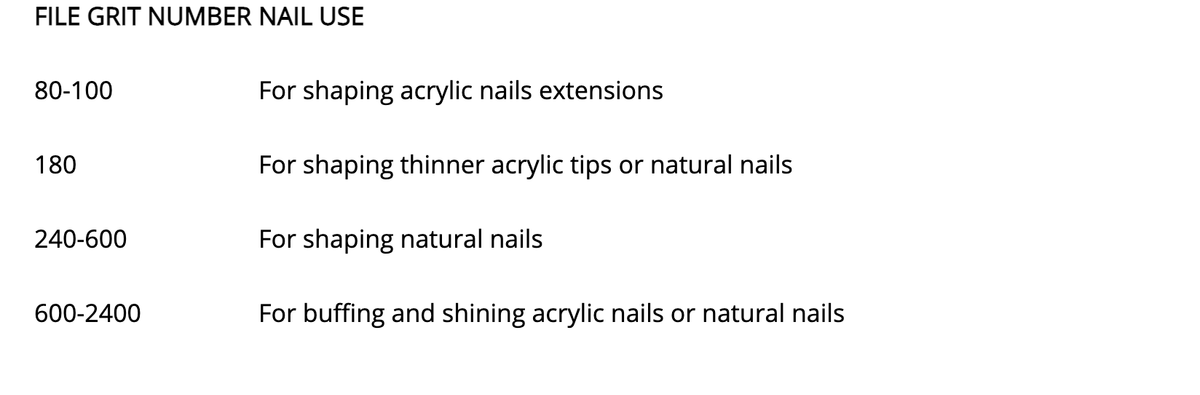
The file grit number starts as low as 80 (coarse) and as high as 1000+ (superfine).
Here's a handy chart to lay this all out.
NAIL FILE GRIT GUIDE
What are the types of manual nail files?
If those file grit numbers seem daunting, don't let them overwhelm you. According to Sine, DipWell's Community Educator, there are four types of nail files a DIY-er like you will need to use.
- COARSE FILES (80-100 grit): For shaping acrylic or gel nail enhancements and filing down thickness and length
These manual nail files have fewer grit particles, hence they are very abrasive manual nail files and not recommended to be used on natural nails.
- MEDIUM GRIT FILES (180 grit): For lightly buffing dip, acrylic, or gel enhancements and for filing the free edge of your natural nails
These nail files are less abrasive because they contain more grit particles. But much like coarse files, they are also not recommended to be used for buffing natural nails.
- FINE GRIT FILES (240-600 grit): For smoothing and finishing work on dip, acrylics, wraps, and gels. They are also great for removing natural oils and invisible cuticles.
These manual nail files are the least abrasive and soft enough to lightly buff the natural nail bed without thinning and causing nail damage.
- EXTRA FINE GRIT FILES (600-2400 grit): For creating high shine on natural nails and nail enhancements, making the nail appear as if top coat has been applied
These nail files will feel smooth to the touch when you run your finger over them. They are also used to prepare the surface of your natural nail for buffing, shining, finishing, and removing ridges and stains.
Electric file vs. manual file: Which DIY nail care tool should you choose?
The truth: you don't really need an e-file. You can get amazing results with just the right manual nail files and buffers. But nail pros and experienced DIYers sure prefer an electric file since it’s a faster way to prep and shape your nails when used correctly, although it does take time to master them.
Now that we've shared both sides of this hot-button topic, tell us...
Are you Team E-file or Team Manual File?
Join the conversation in DipWell's Dipper Club, or connect with us on Instagram via @dipwellnails or our official hashtag #DoYouDipWell. Hope to see you there!
Get free tutorials, special deals every week!
Sign up for fresh nail inspo & exclusive discounts delivered right to your inbox.
By subscribing, you acknowledge our Privacy Policy.